
- Android TextView java
- Android EditText
- Android AutoCompleteTextView
- CheckedTextView Android
- Android Button
- Android CheckBox
- Android RadioGroup Example
- Android RadioButton Example
- Android ToggleButton
- Android Switch
- Android ImageView
- Android WebView
- Android SeekBar
- Android CalanderView
- Android VideoView
- Android ProgressBar
- Android RatingBar
- Android SearchView
- Android ConstraintLayout
- Android LinearLayout
- Android Spinner
- Android ScrollView
- Android CardView
- Android Collapsing toolbar Example java
- Current Location Android
- Android Airplane Mode, Bluetooth BroadcastReceiver example
- Android Service Example
- Android Detect Phone Call BroadcastReceiver example
- Android RecyclerView Example
- Android RecyclerView Example with model class
- Android sharedpreferences Example
- Android Retrofit Example Java
- Android Retrofit Example With RecyclerView
- Android MVP Login Example
- Android Fragment Example
- Android MVP Retrofit Example
- Android Auto Image Slider with LInk Example Java
- Android Bottom navigation Example Java
- Android pdf viewer URL and Asset folder example
- Android Pay-pal Integration Example Java
- Room Database Example
- Send and Recieve Data Firebase Firestore
- Android Facebook login by Java
- View Binding Example
- Data Binding Example
- Send an image to the server by retrofit android example Java
- Android Audio Play Push Example Java
- Scan QR Android
- Create QR Code Android Java example
- Google Map Android Example
- Search location Android
- Android Interface java example
- Android BroadcastReceiver Example
- Android Intent Example
- Android battery low, battery percentage, battery status (charging or not), Battery Health BroadcastReceiver example
- Android Custom Navigation Drawer Java
- Android Custom 3 dot menu example java
- Android sslcommerz Integration Example Java
- Android TabLayout Java Example
- Android AlarmManager exmaple
- Android Google Signin example Java
- Android Lottie animation example java
- Android Custom Toolbar Back Button Example
- Android Push Notification Example Java
- Android Language Change example Java
- Dark Mode Light Mode Android Example Java
- Android Exit Alart Dialog Java
- Android Custom Dialog Popup Java
- Android Auto Image Slider Example Java
- SearchView from ArrayList
- Firebase phone authentication
- Image Download From URL and save in the folder
- Onboarding Screen with ViewPager2
- Pagination in RecyclerView
- Shimmer Loading Effect
- Bottom Sheet Dialog
- Image, button transition left to right, right to left
- Voice To Text Example Android
- Image animation left to right, top to bottom Android Example Java
- Splash Screen Android Example Java
- Records audio and saves it to a folder Android Java Example
- Text Font add Android Example Java
- Take a picture from the camera set in the imageView Android
- Android Get Picture from folder set in image view
- Android Responsive Design layout for tab and phone
- Android Landscape and Portrait screen design
- Point my Current location Android
- Android Multi Select Spinner example Java
- Page Zoom Controls Android Example Java
- Dependency Injection with Dagger 2 Android Java Example
- Dagger Hilt Android Example Java
- Agora Video Audio Call Example
- Android Connect LAN printer and Print Data
- Android Connect bluetooth printer and Print Data
- DeepLink Android Example
- Socket Connection Android Example
- Web Scrapping Example in Android Java
- Button Click Open Gmail app and send email android java example
- Firebase Email Verification
- Button Click Text Zoom IN/OUT Android Java
- Zoom In /Out With Finger Touch Android java Example
Firebase phone authentication
03-Oct-2024Firebase phone authentication
** Note Some Image text is blank for security purposes
** In this project for testing we use a dummy phone number and dummy code if you want to test with the real phone then you must need to add the billing account to your Firebase
Output:
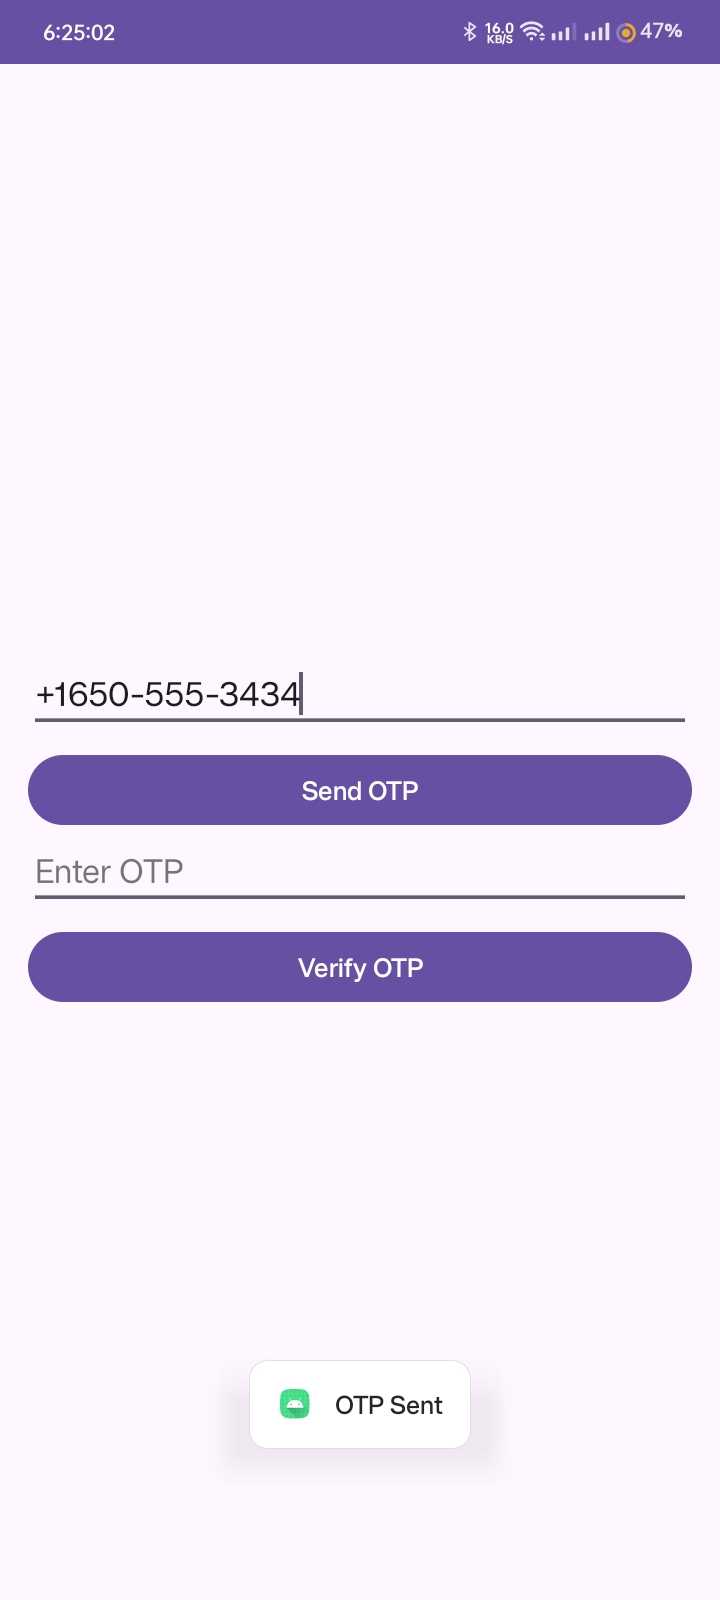
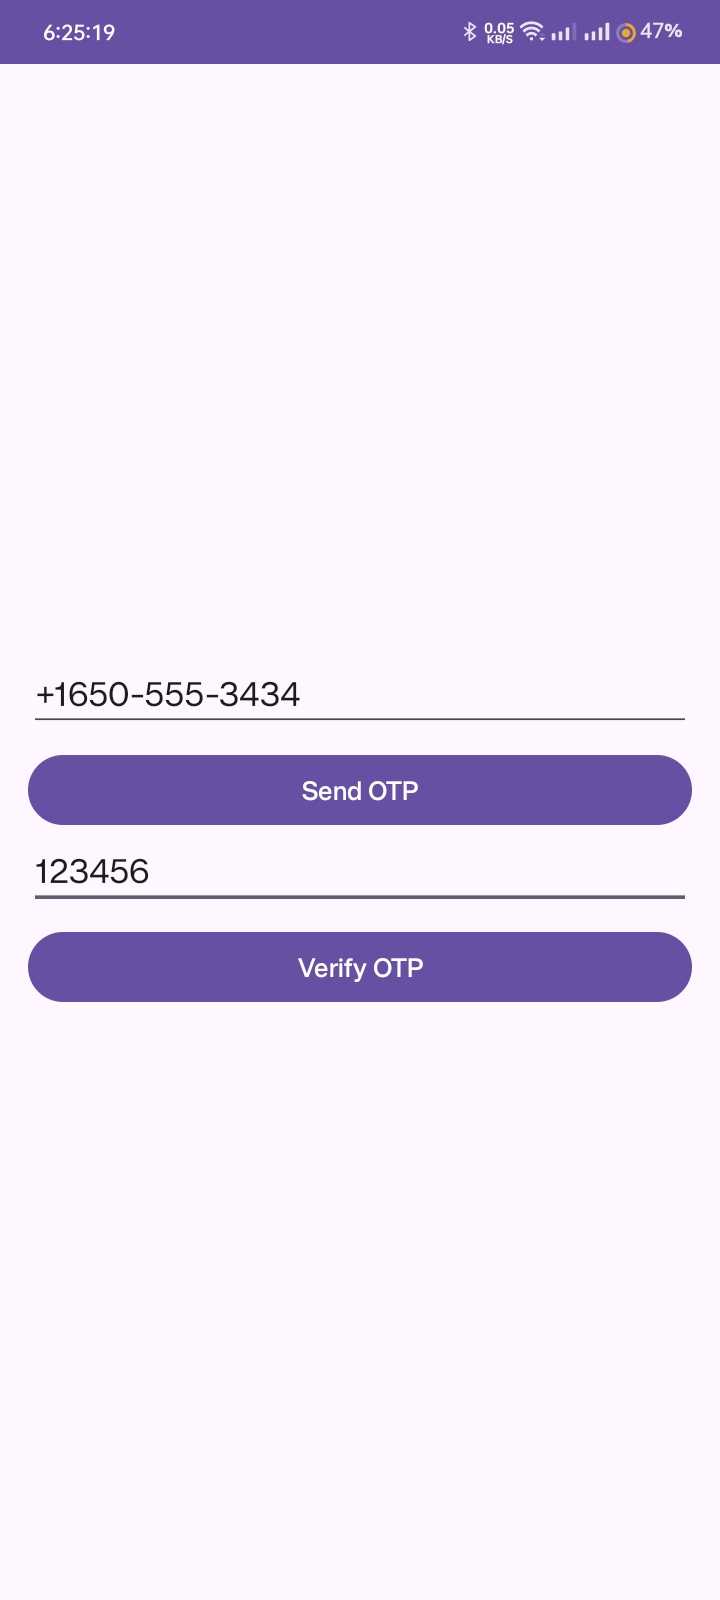

Now Let's start the project.
1/ Create an Empty Views Activity project: Firebase Phone Authentication
2/ Create another activity SuccessActivity
3/ Modify your AnroidManifest.xml
<?xml version="1.0" encoding="utf-8"?>
<manifest xmlns:android="http://schemas.android.com/apk/res/android"
    xmlns:tools="http://schemas.android.com/tools">

    <uses-permission android:name="android.permission.INTERNET" />

    <application
        android:allowBackup="true"
        android:dataExtractionRules="@xml/data_extraction_rules"
        android:fullBackupContent="@xml/backup_rules"
        android:icon="@mipmap/ic_launcher"
        android:label="@string/app_name"
        android:roundIcon="@mipmap/ic_launcher_round"
        android:supportsRtl="true"
        android:theme="@style/Theme.FirebasePhoneAuthentication"
        tools:targetApi="31">
        <activity
            android:name=".SuccessActivity"
            android:exported="false" />
        <activity
            android:name=".MainActivity"
            android:exported="true">
            <intent-filter>
                <action android:name="android.intent.action.MAIN" />

                <category android:name="android.intent.category.LAUNCHER" />
            </intent-filter>
        </activity>
    </application>

</manifest>
4/ We will work with recently created activities after connecting the Firebase with the app.
5/ Go to Tools > Firebase
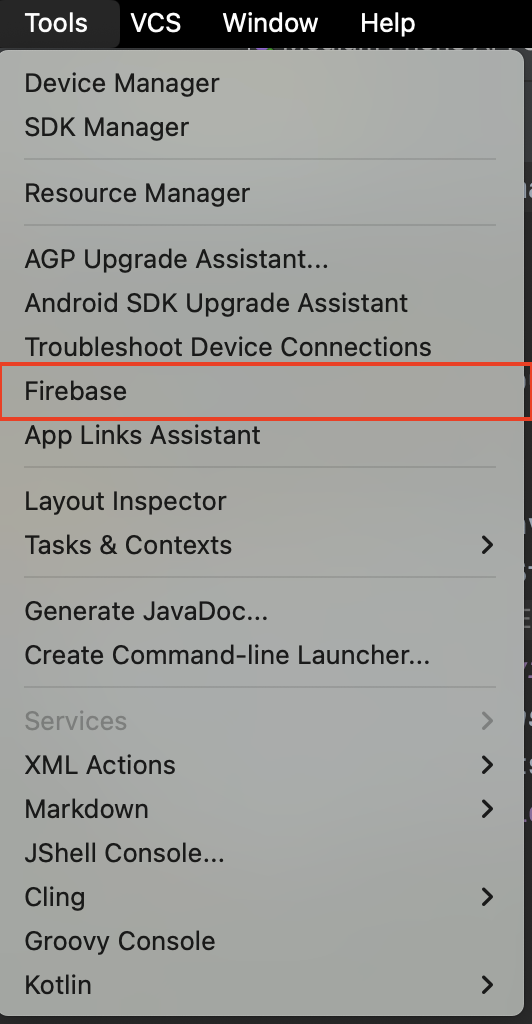
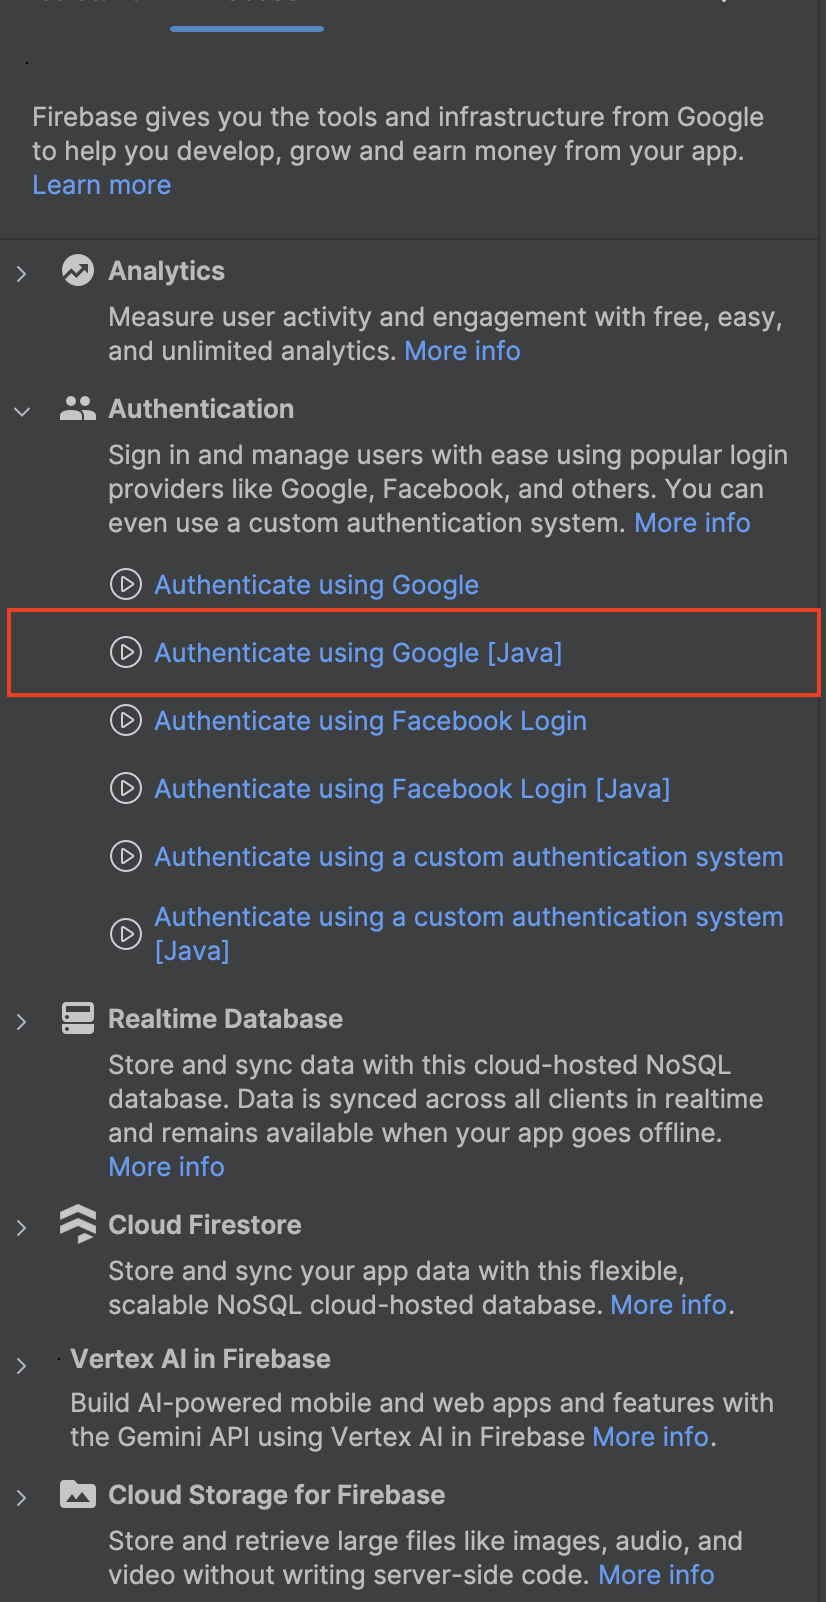
after clicking the firebase shown in the picture above the Firebase assistance tool window will open. then click on Authentication
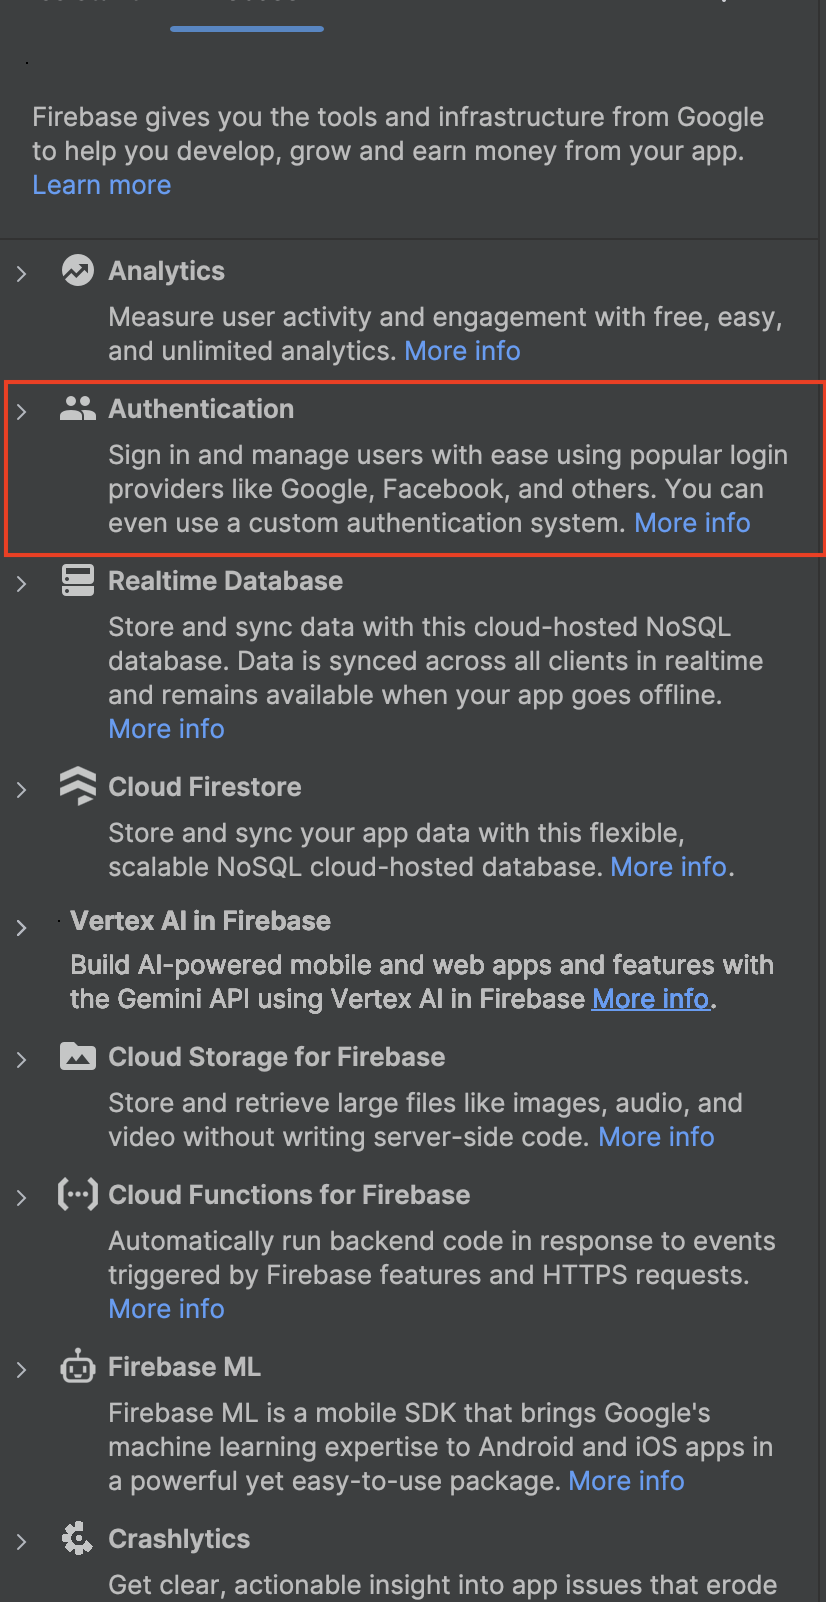
after clicking on the Authentication, a new window will open click on authentication using Google [Java ]
then another new window will open. Click on Connect to Firebase
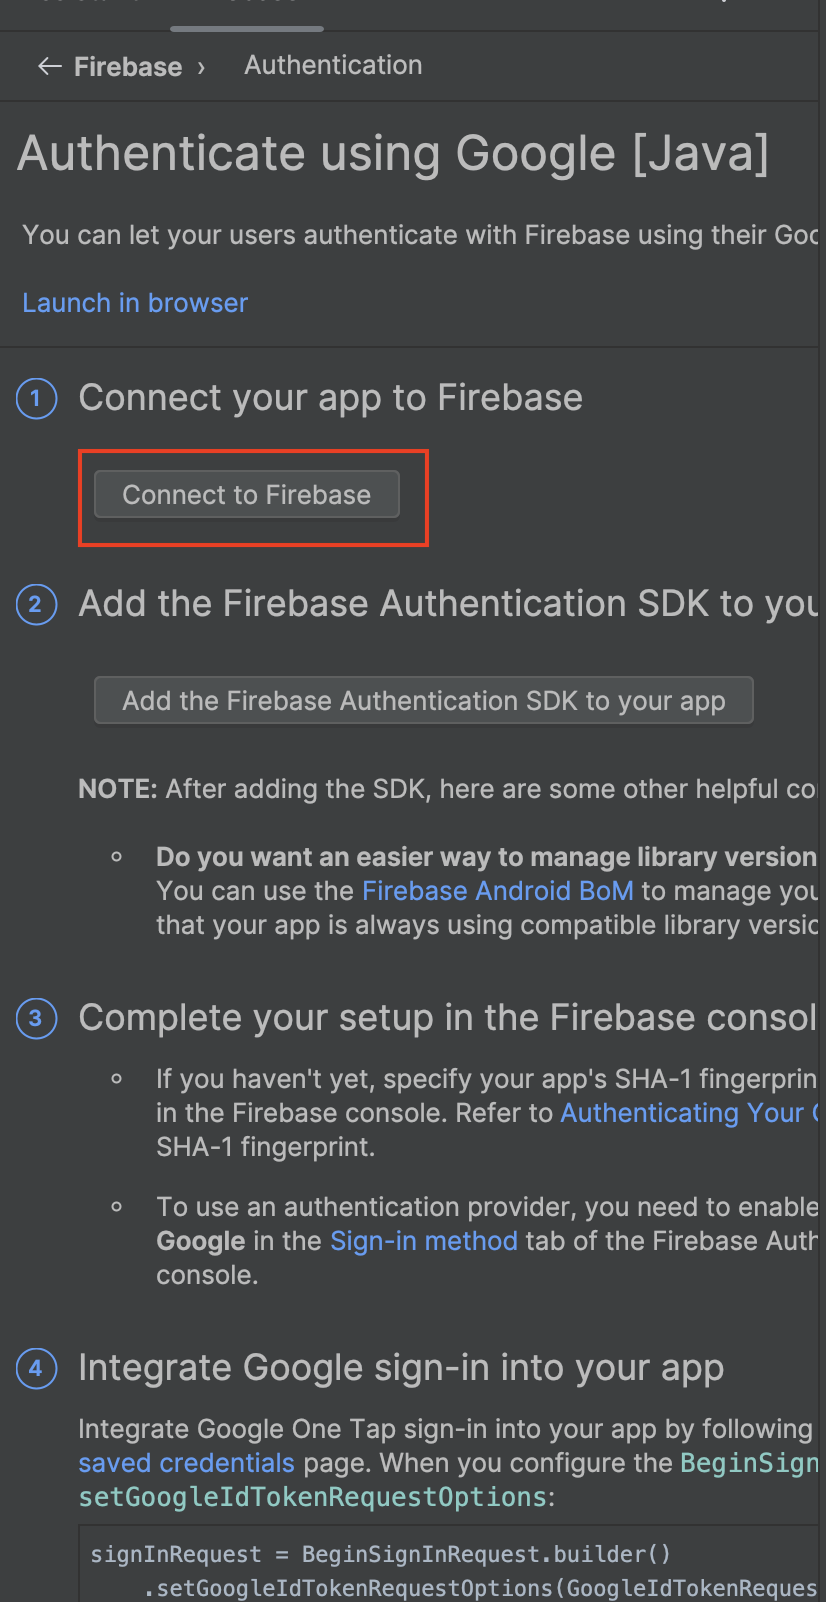
after clicking on Connect to Firebase you will redirect to your web browser. you must log in with your Gmail in the browser.
6/ Now create, connect, and authentication permission in the Firebase project
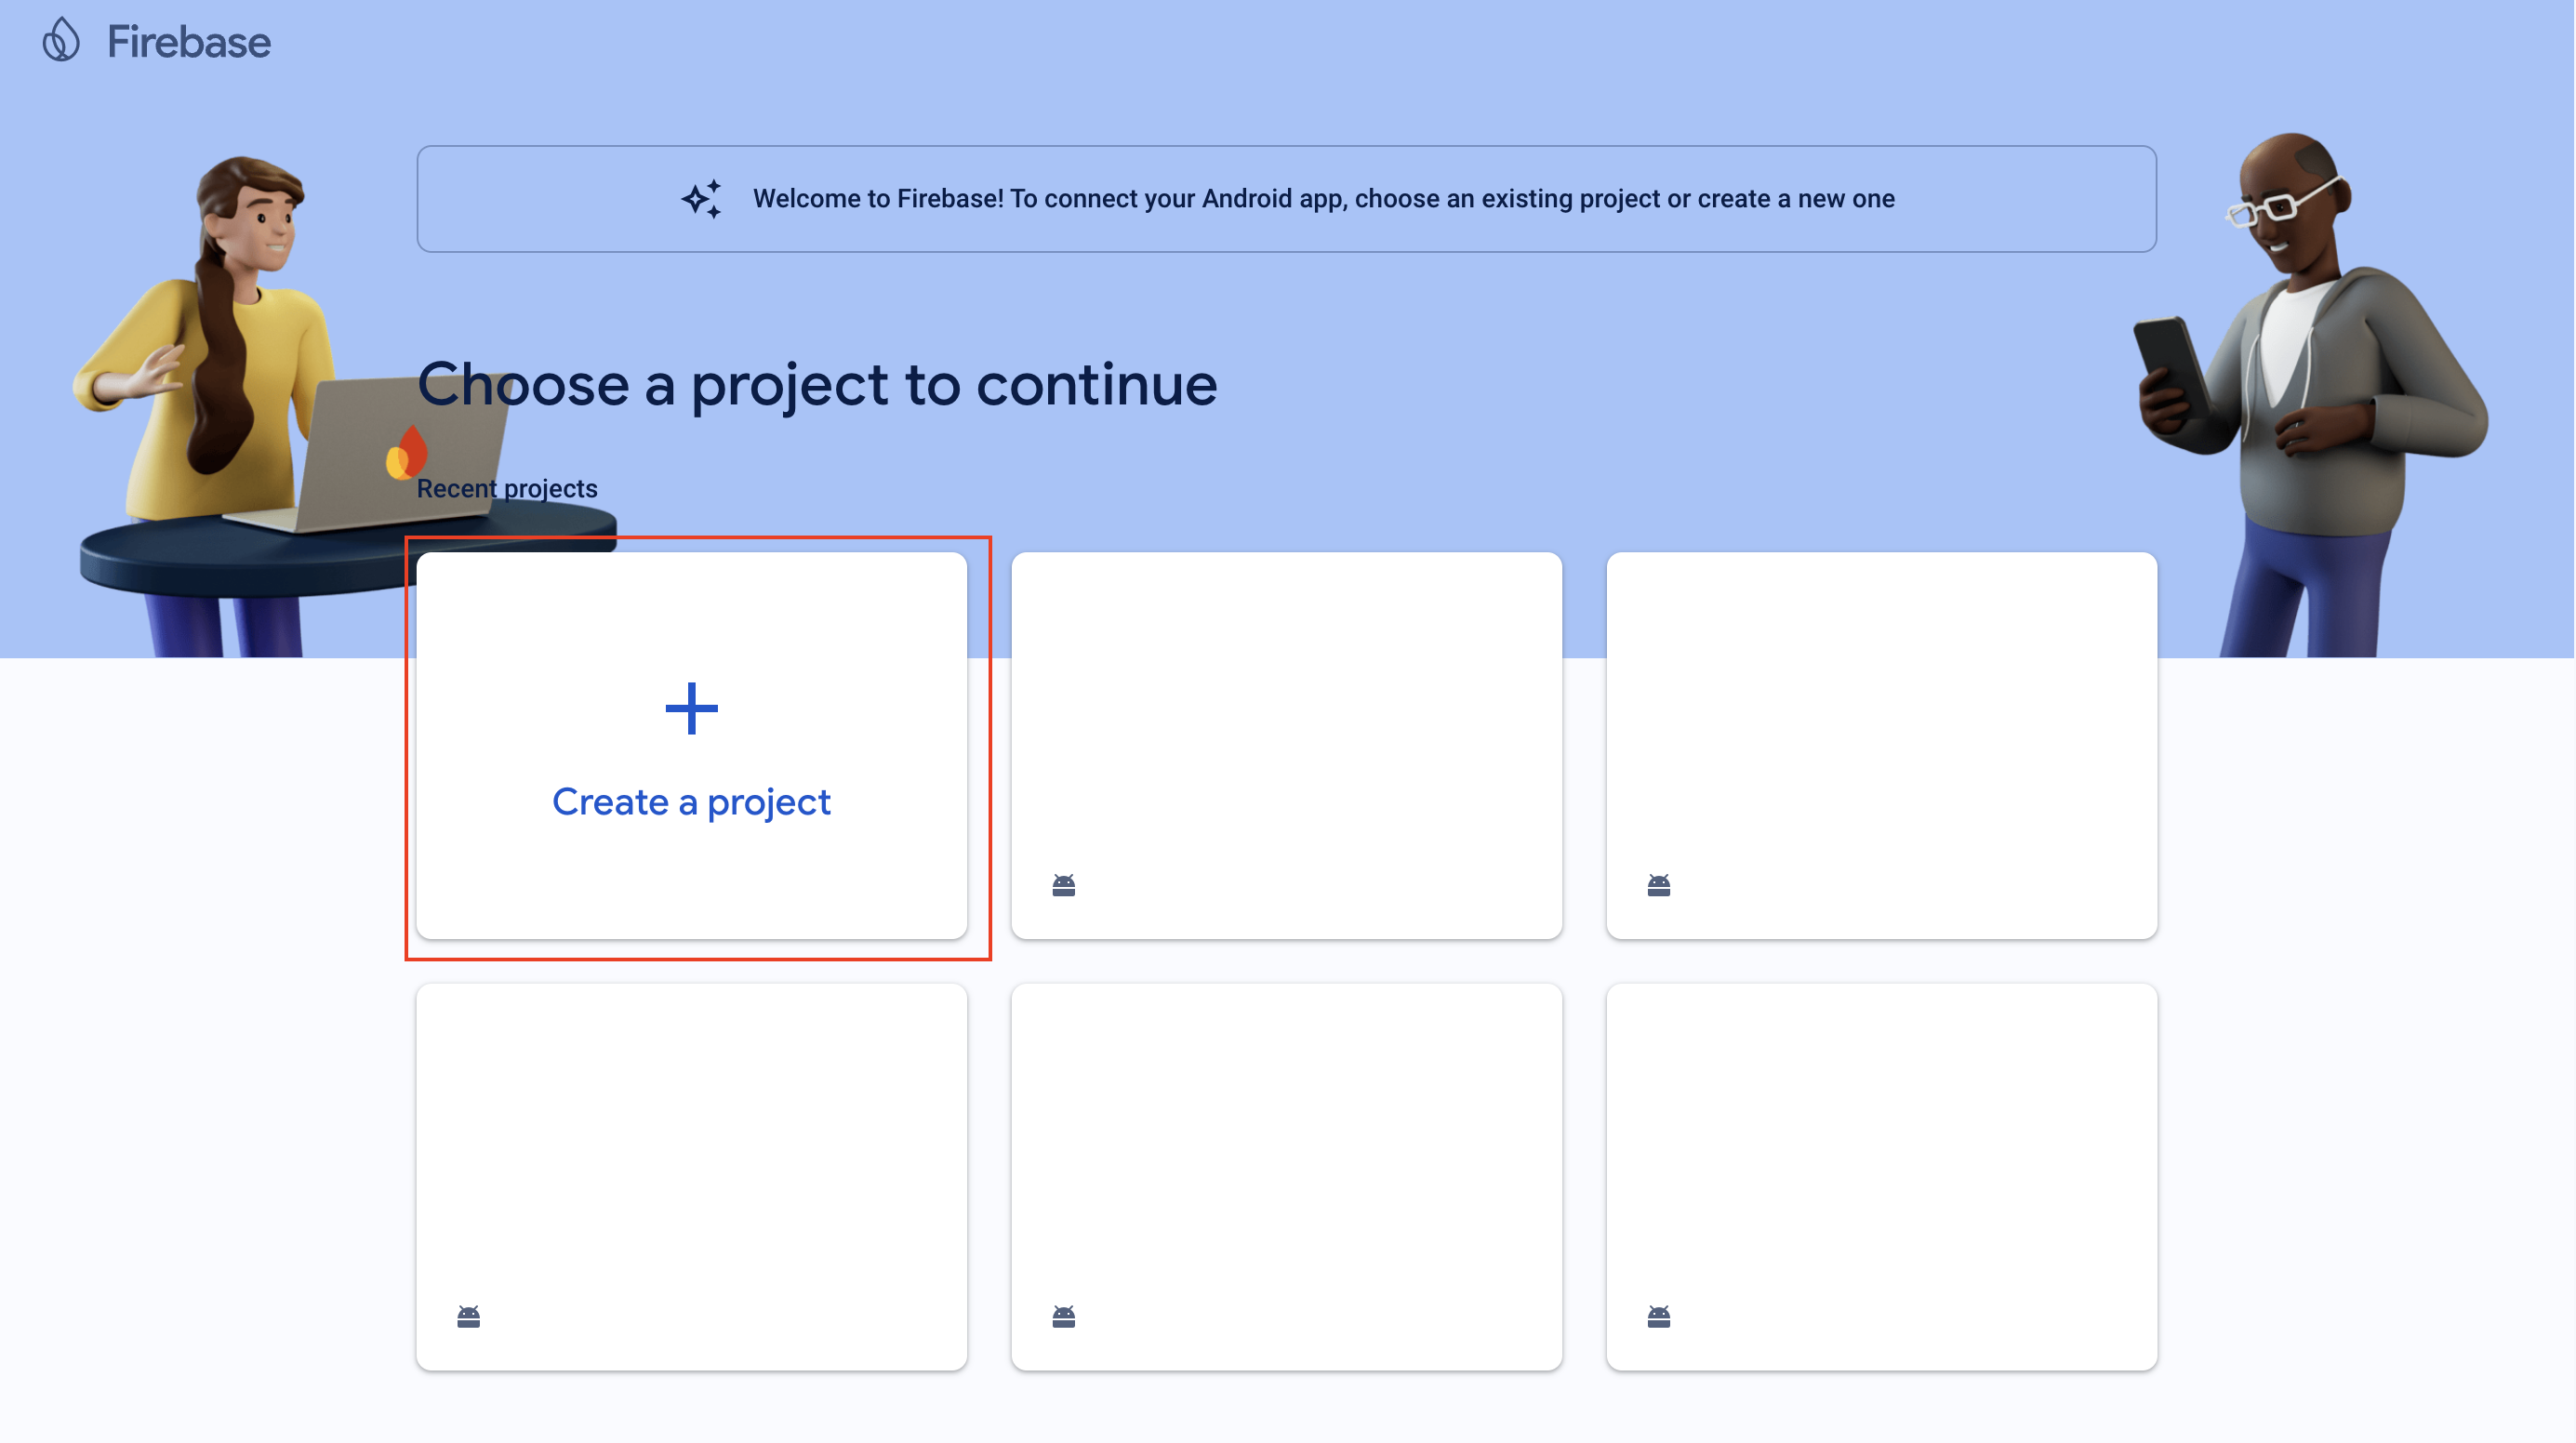
6.1/ Click on the Create New project. after clicking a new window will open
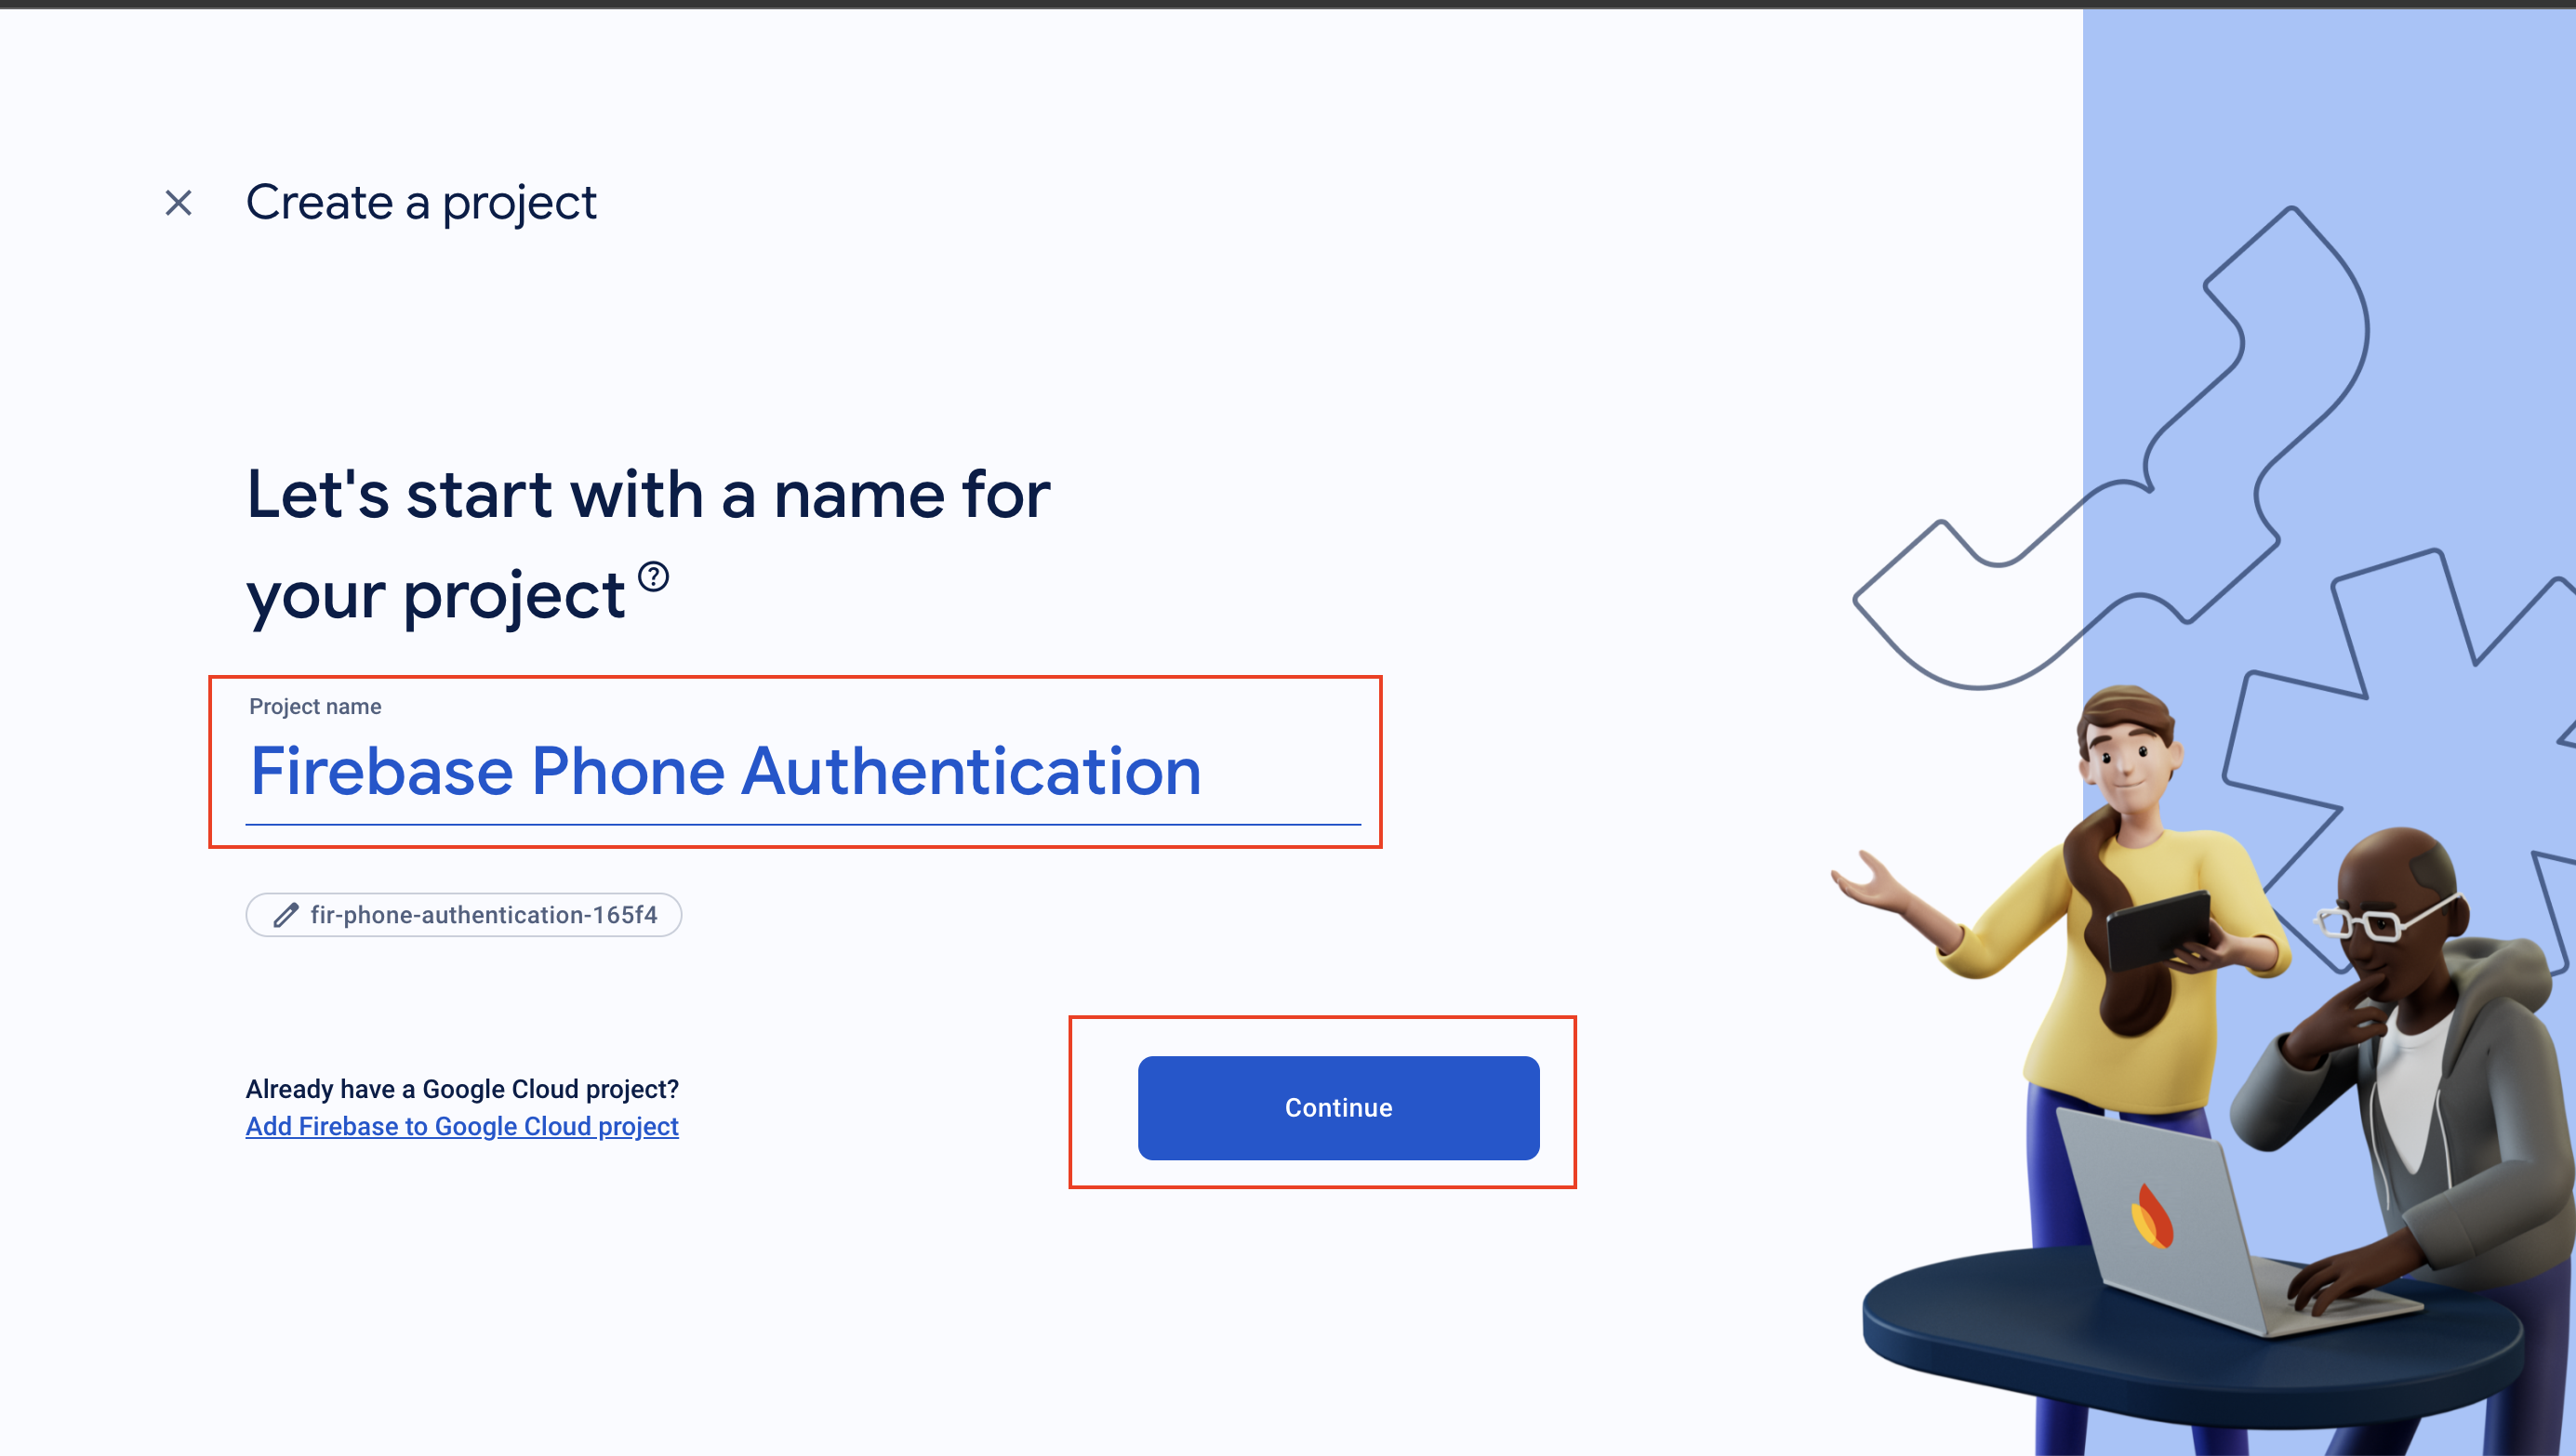
6.2/ Firebase automatically suggests you a name. then click on Continue
6.3/ click on Continue
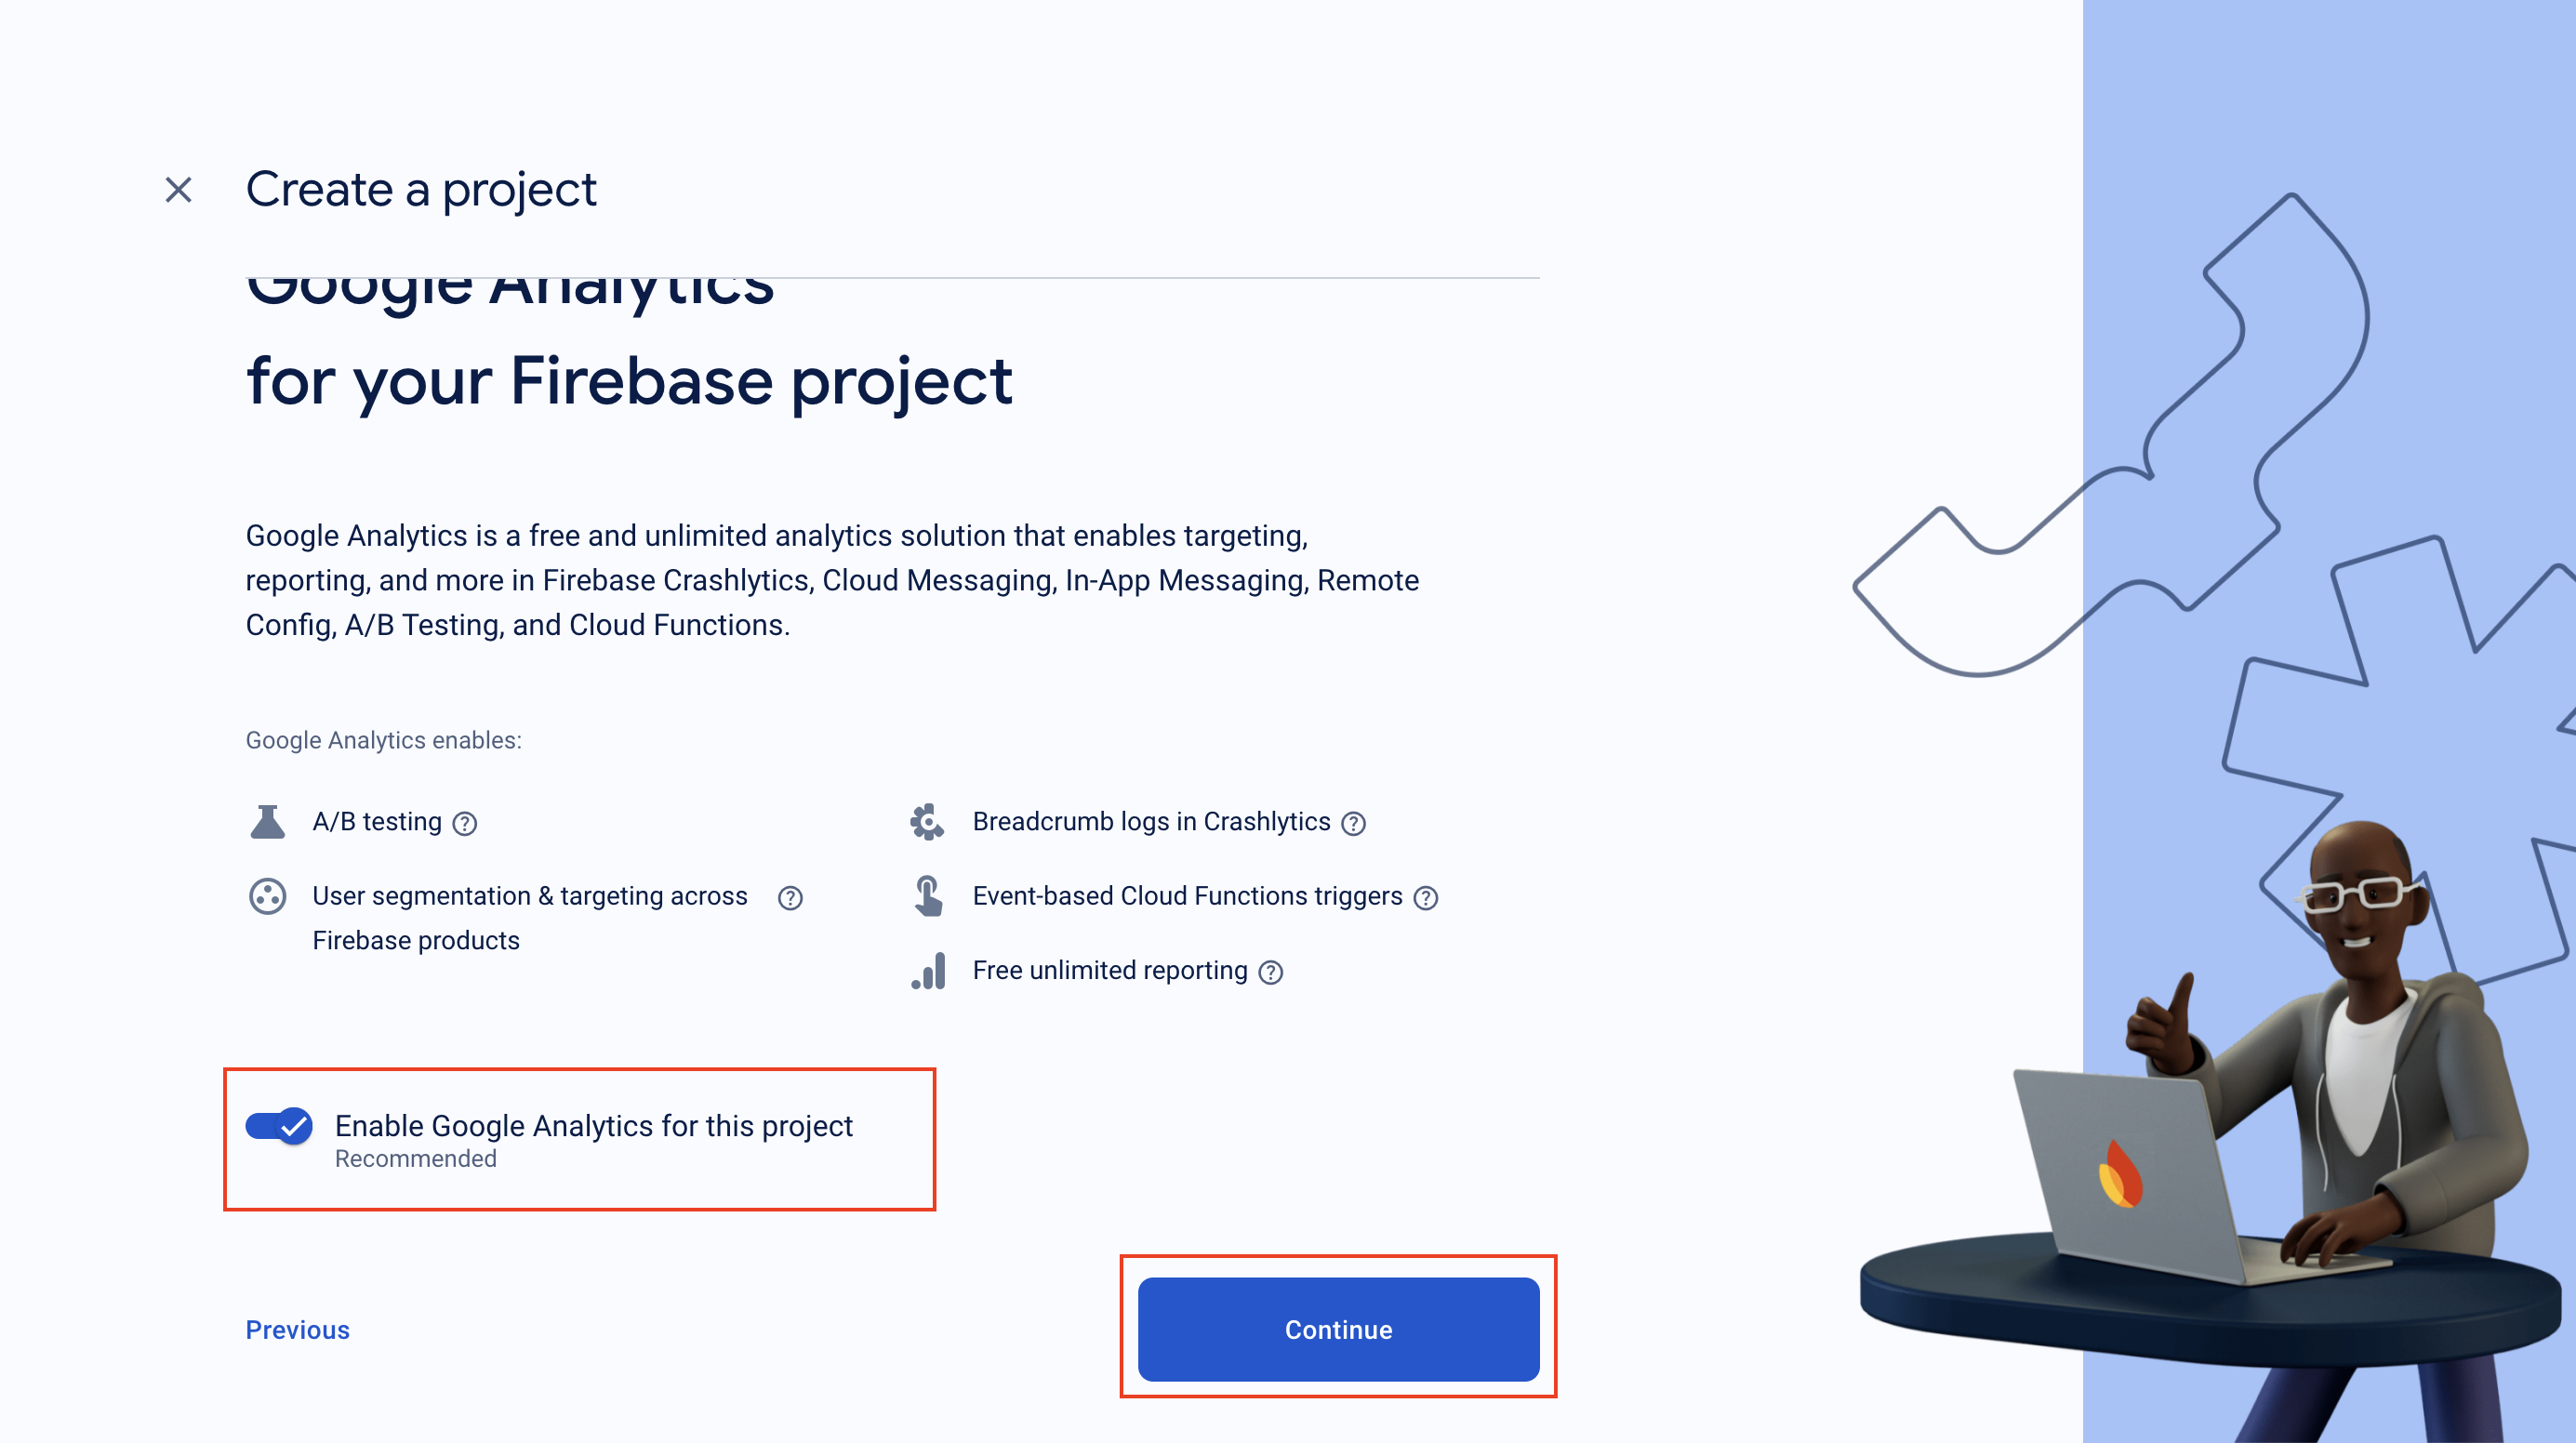
6.4/ Select Default account for Firebase and click on Create Project. You project will start making.
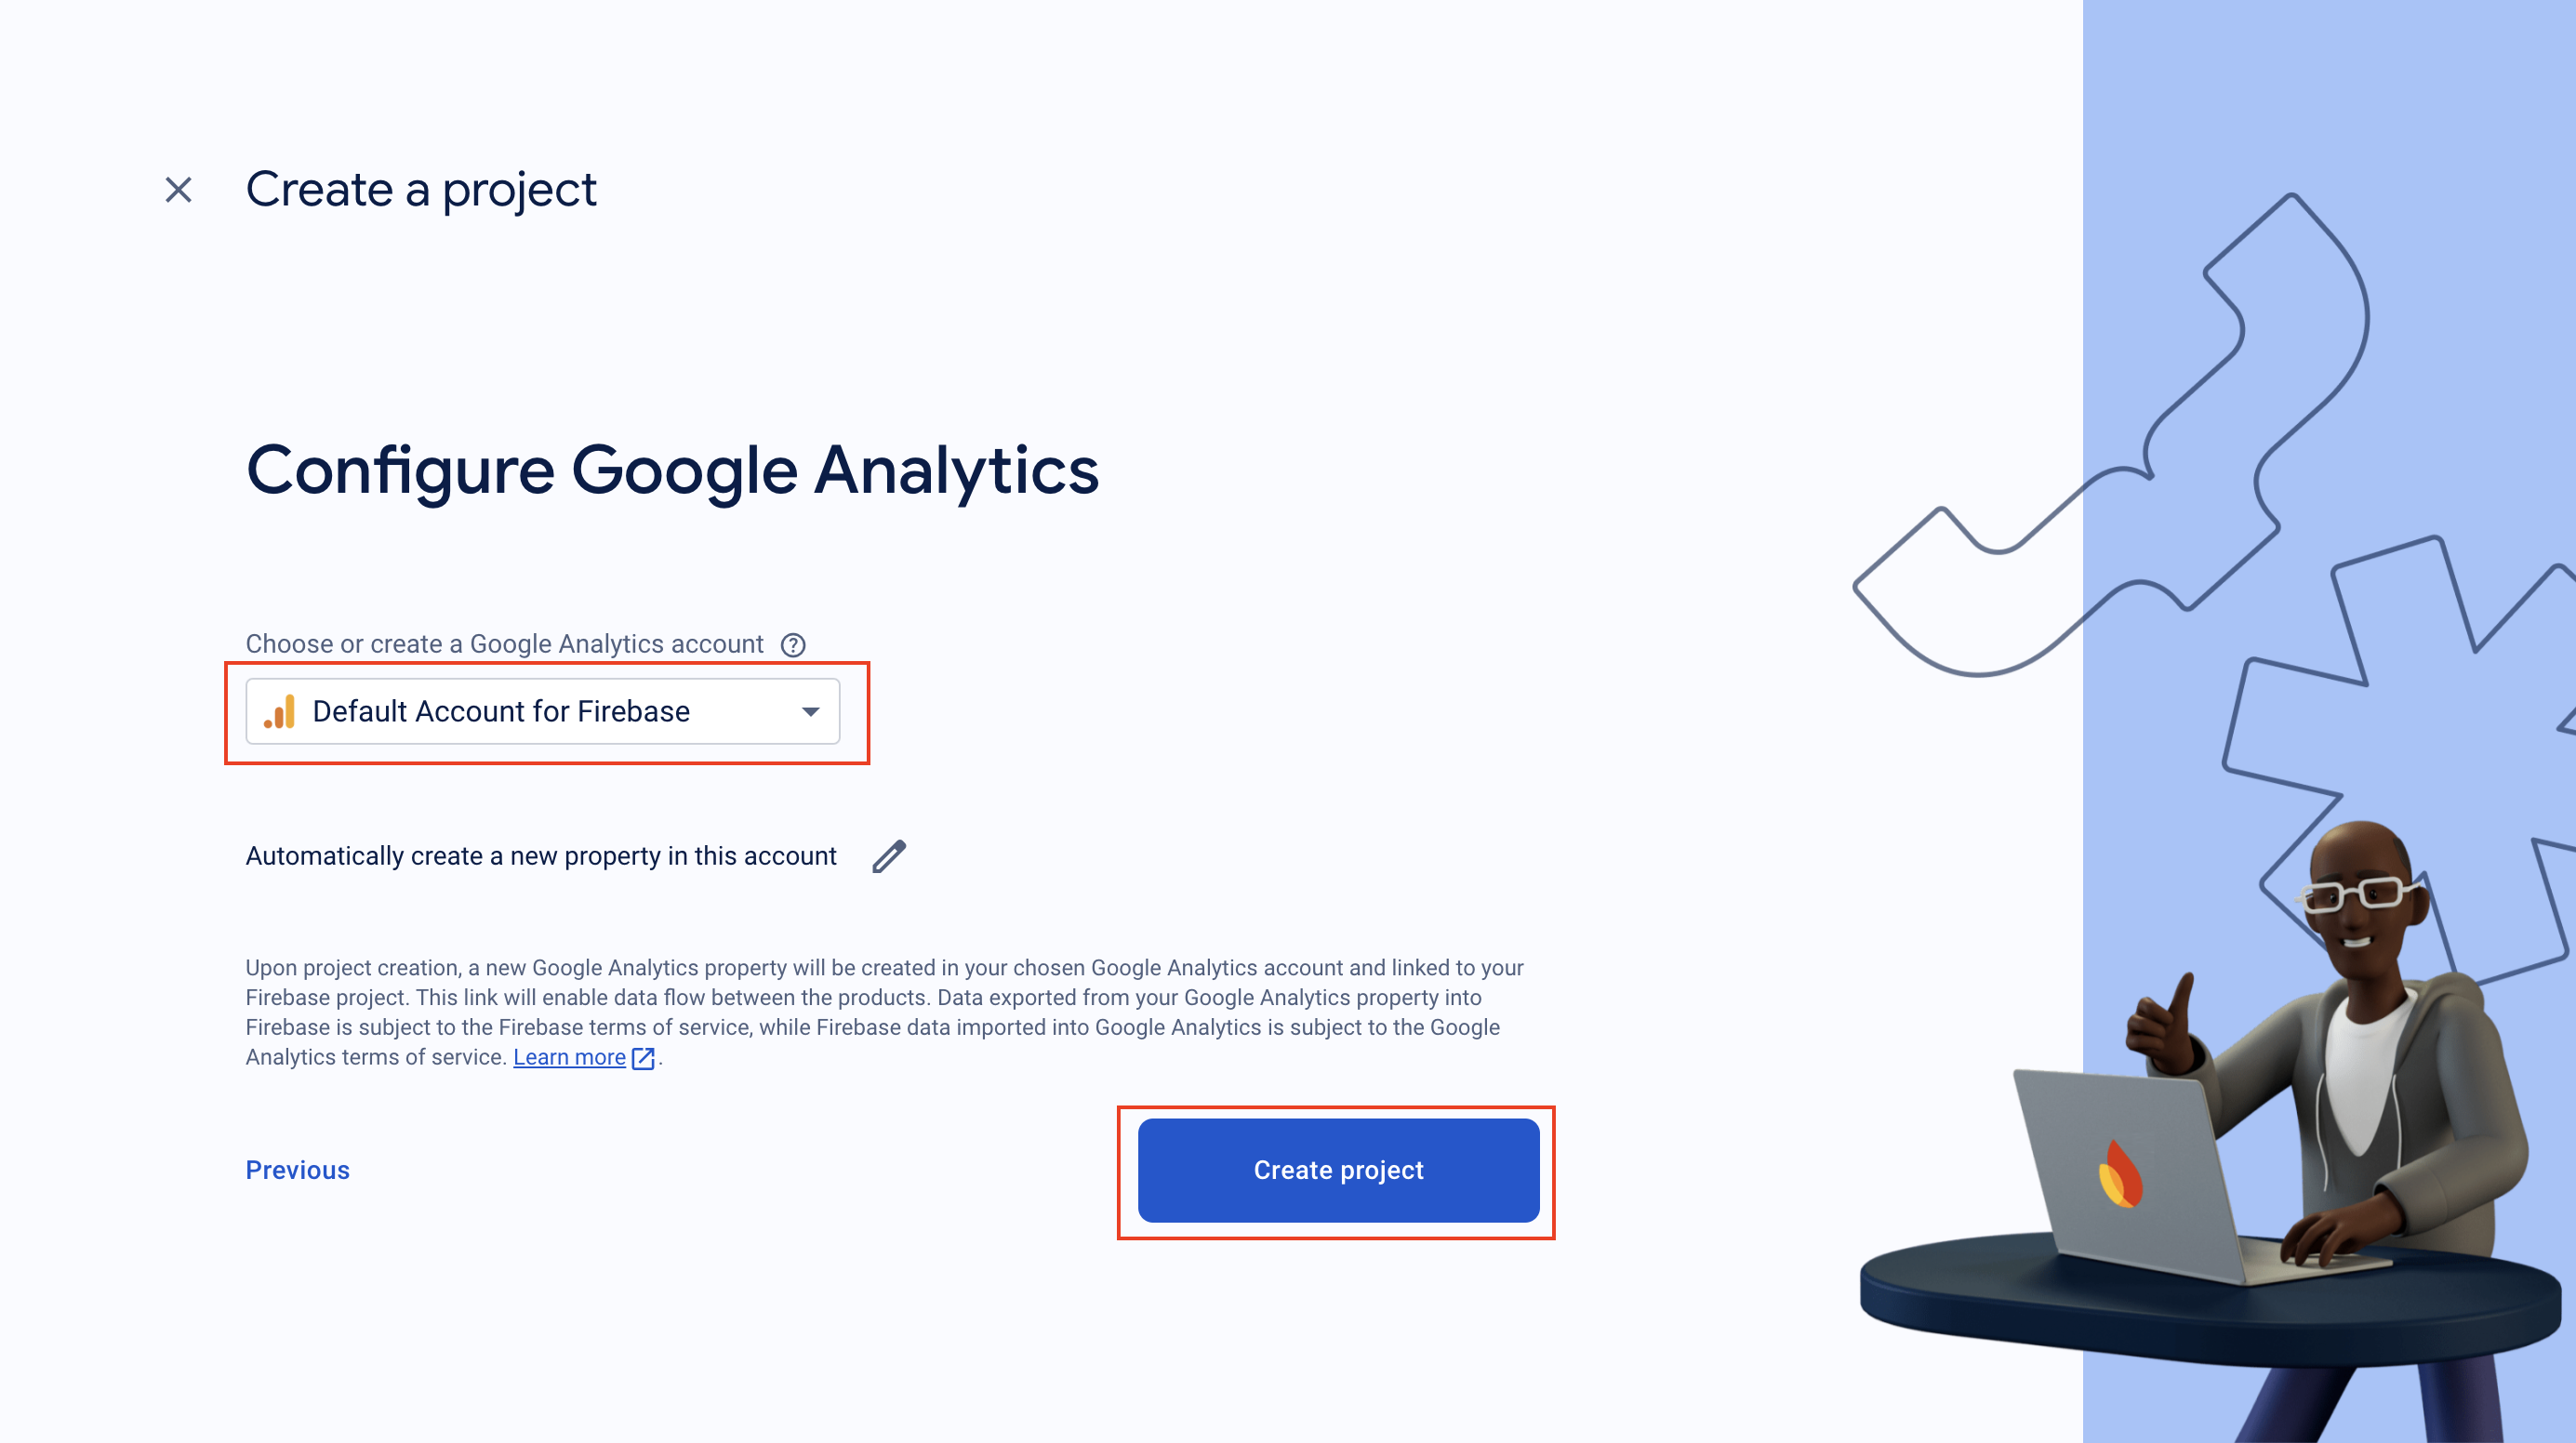
6.5/After completing the project, you will see the button Continue click on it
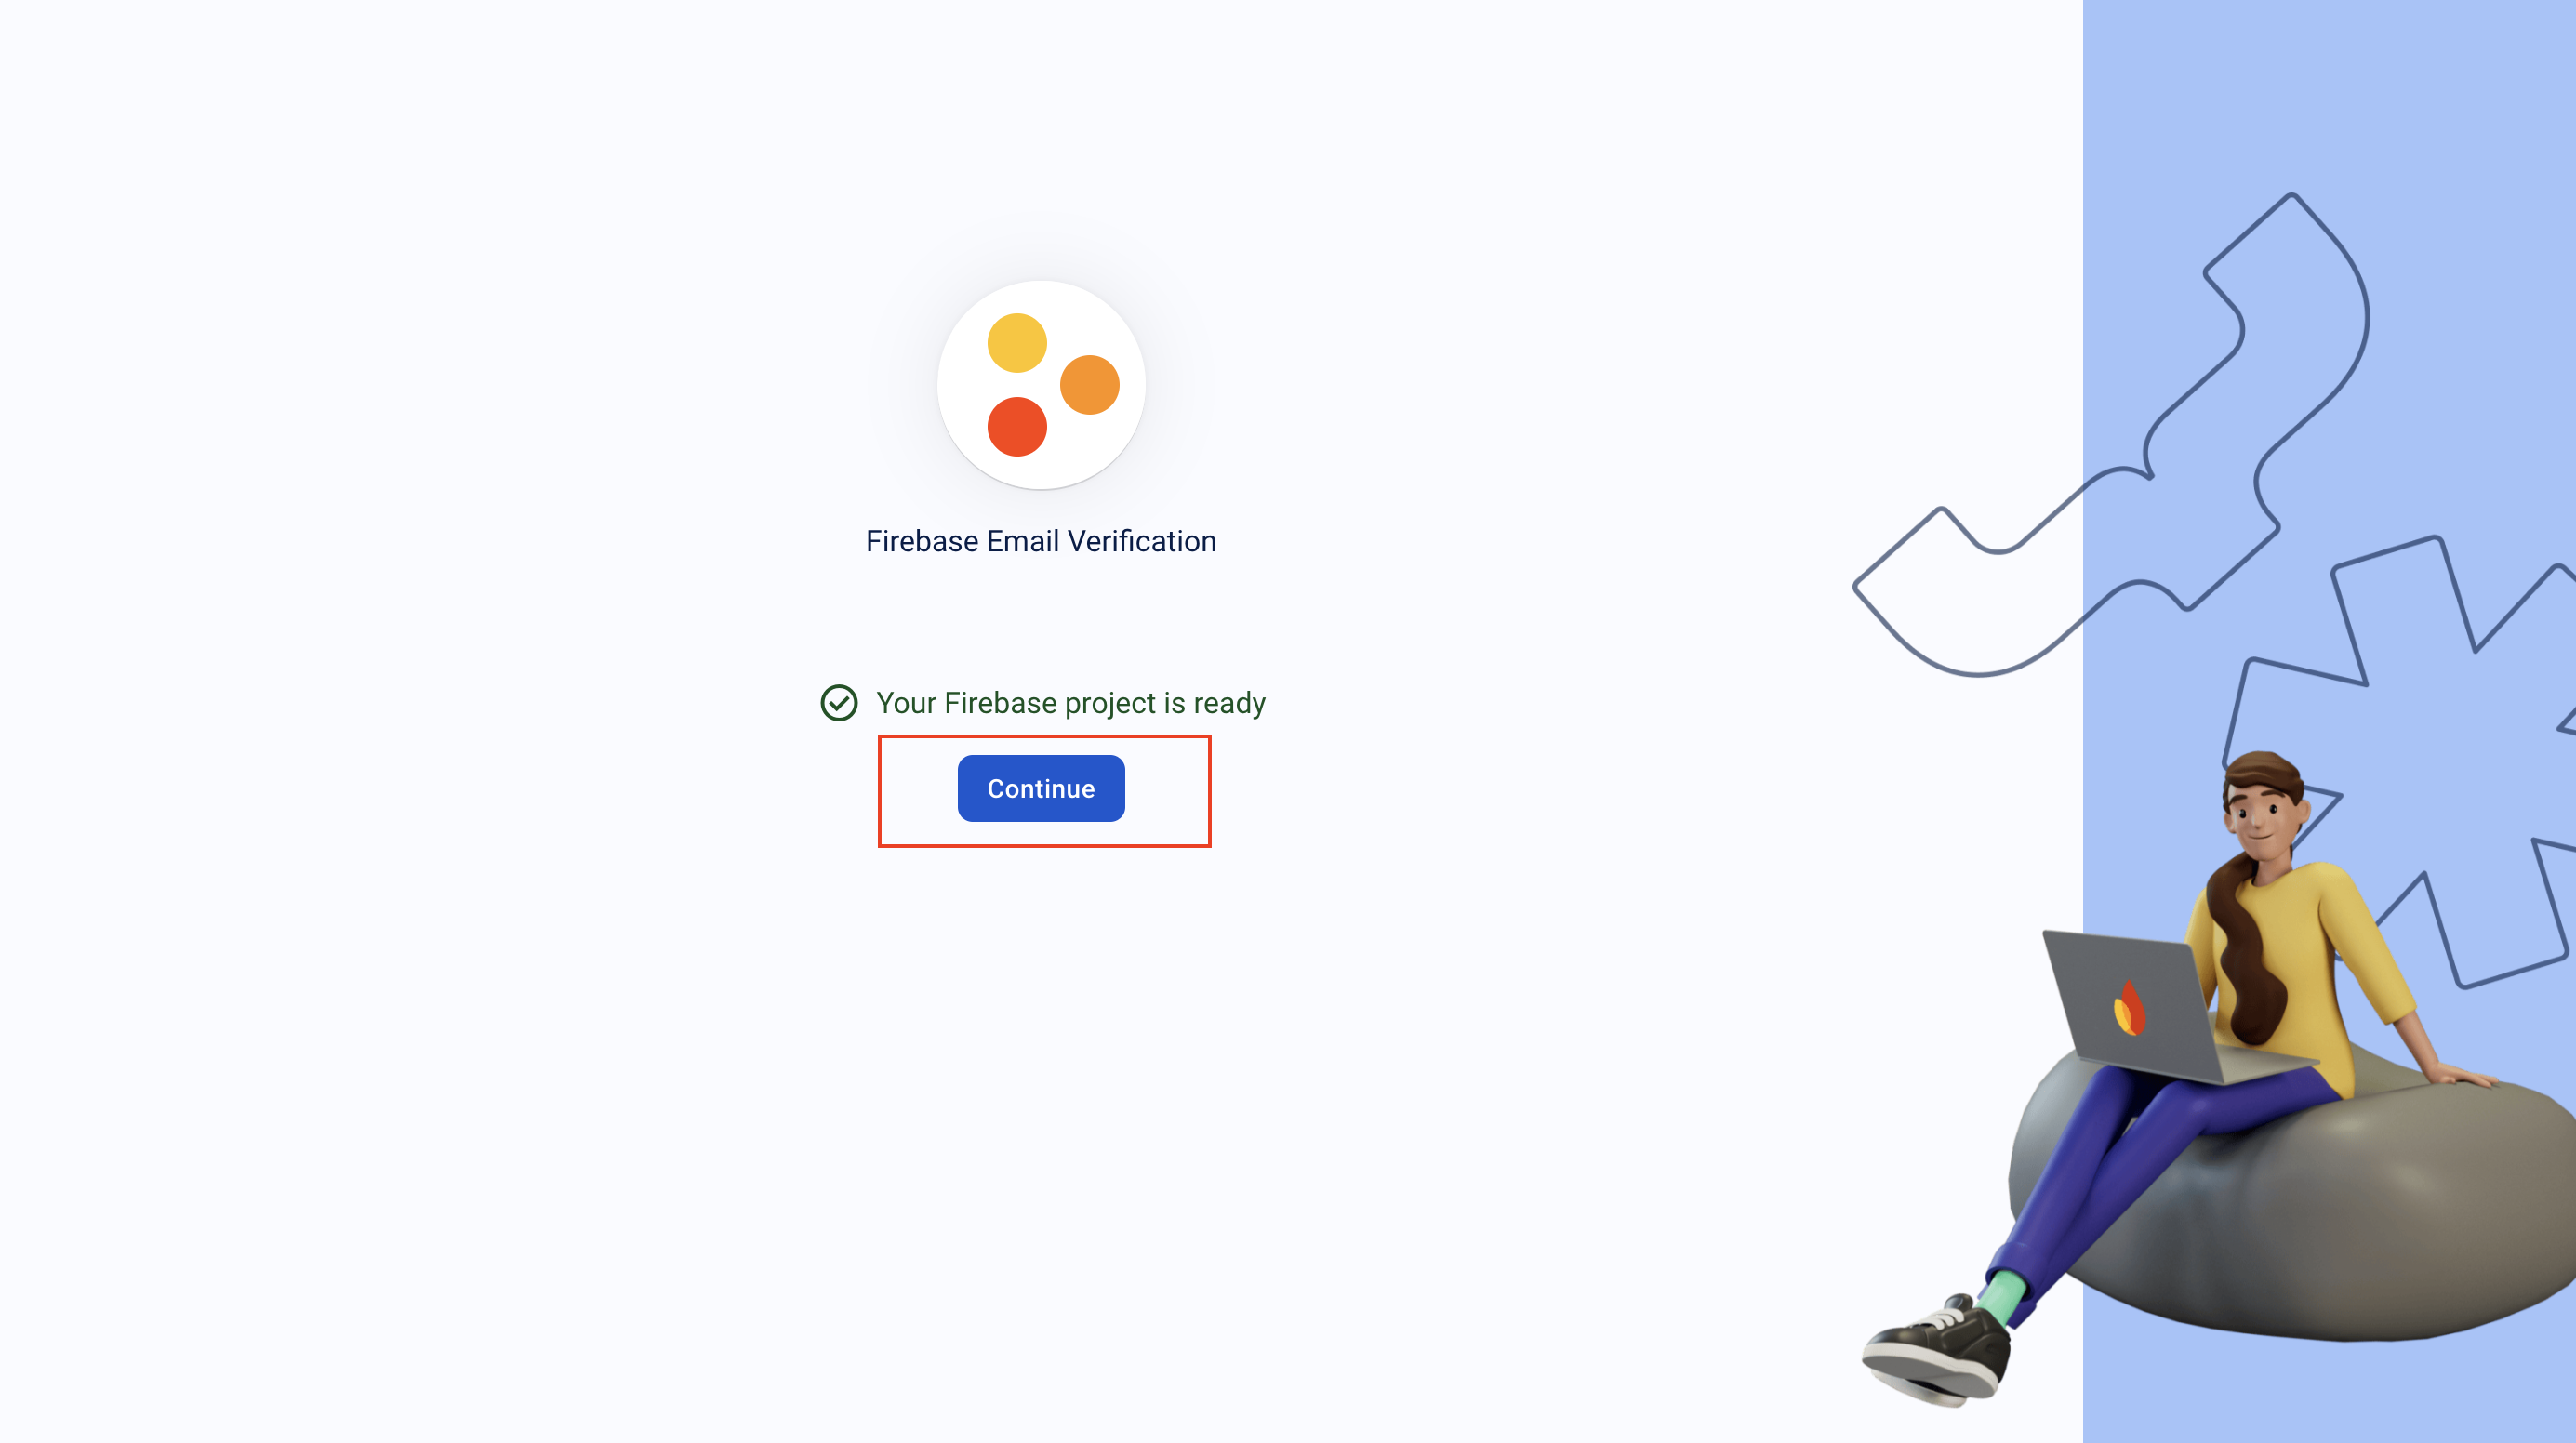
6.6/ Then you will redirect to your project. and you will able to see a popup window here. click on Connect
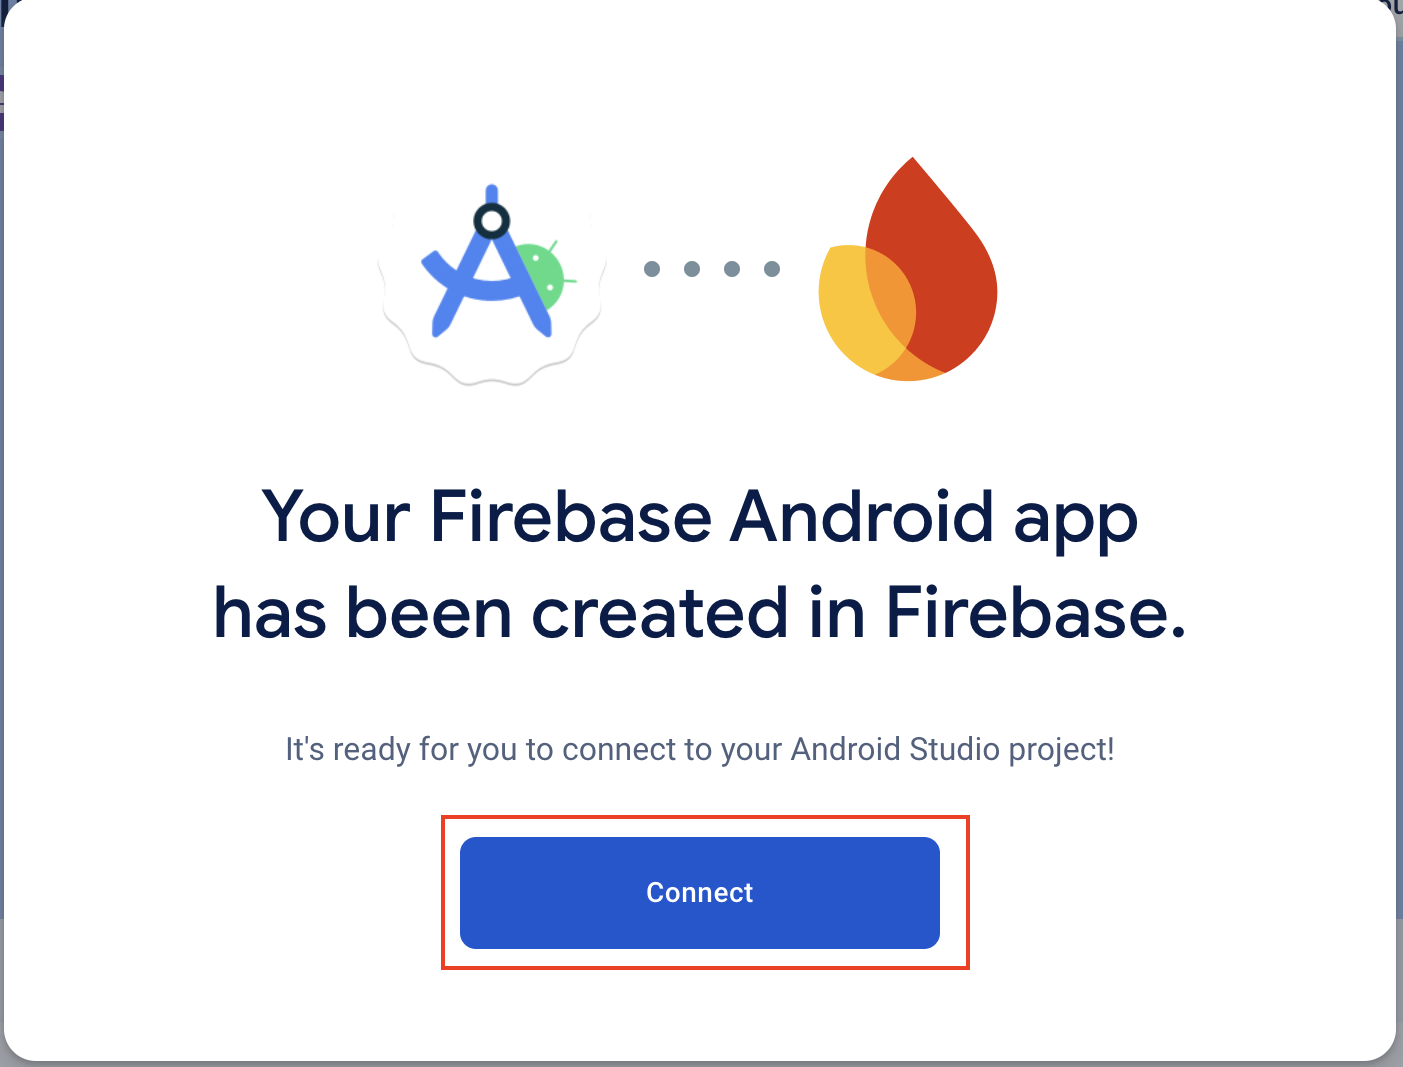
6.7/ Close the project and again open your project from the console.
6.8/ On the sidebar from Build you can find the option Authentication. Click on it

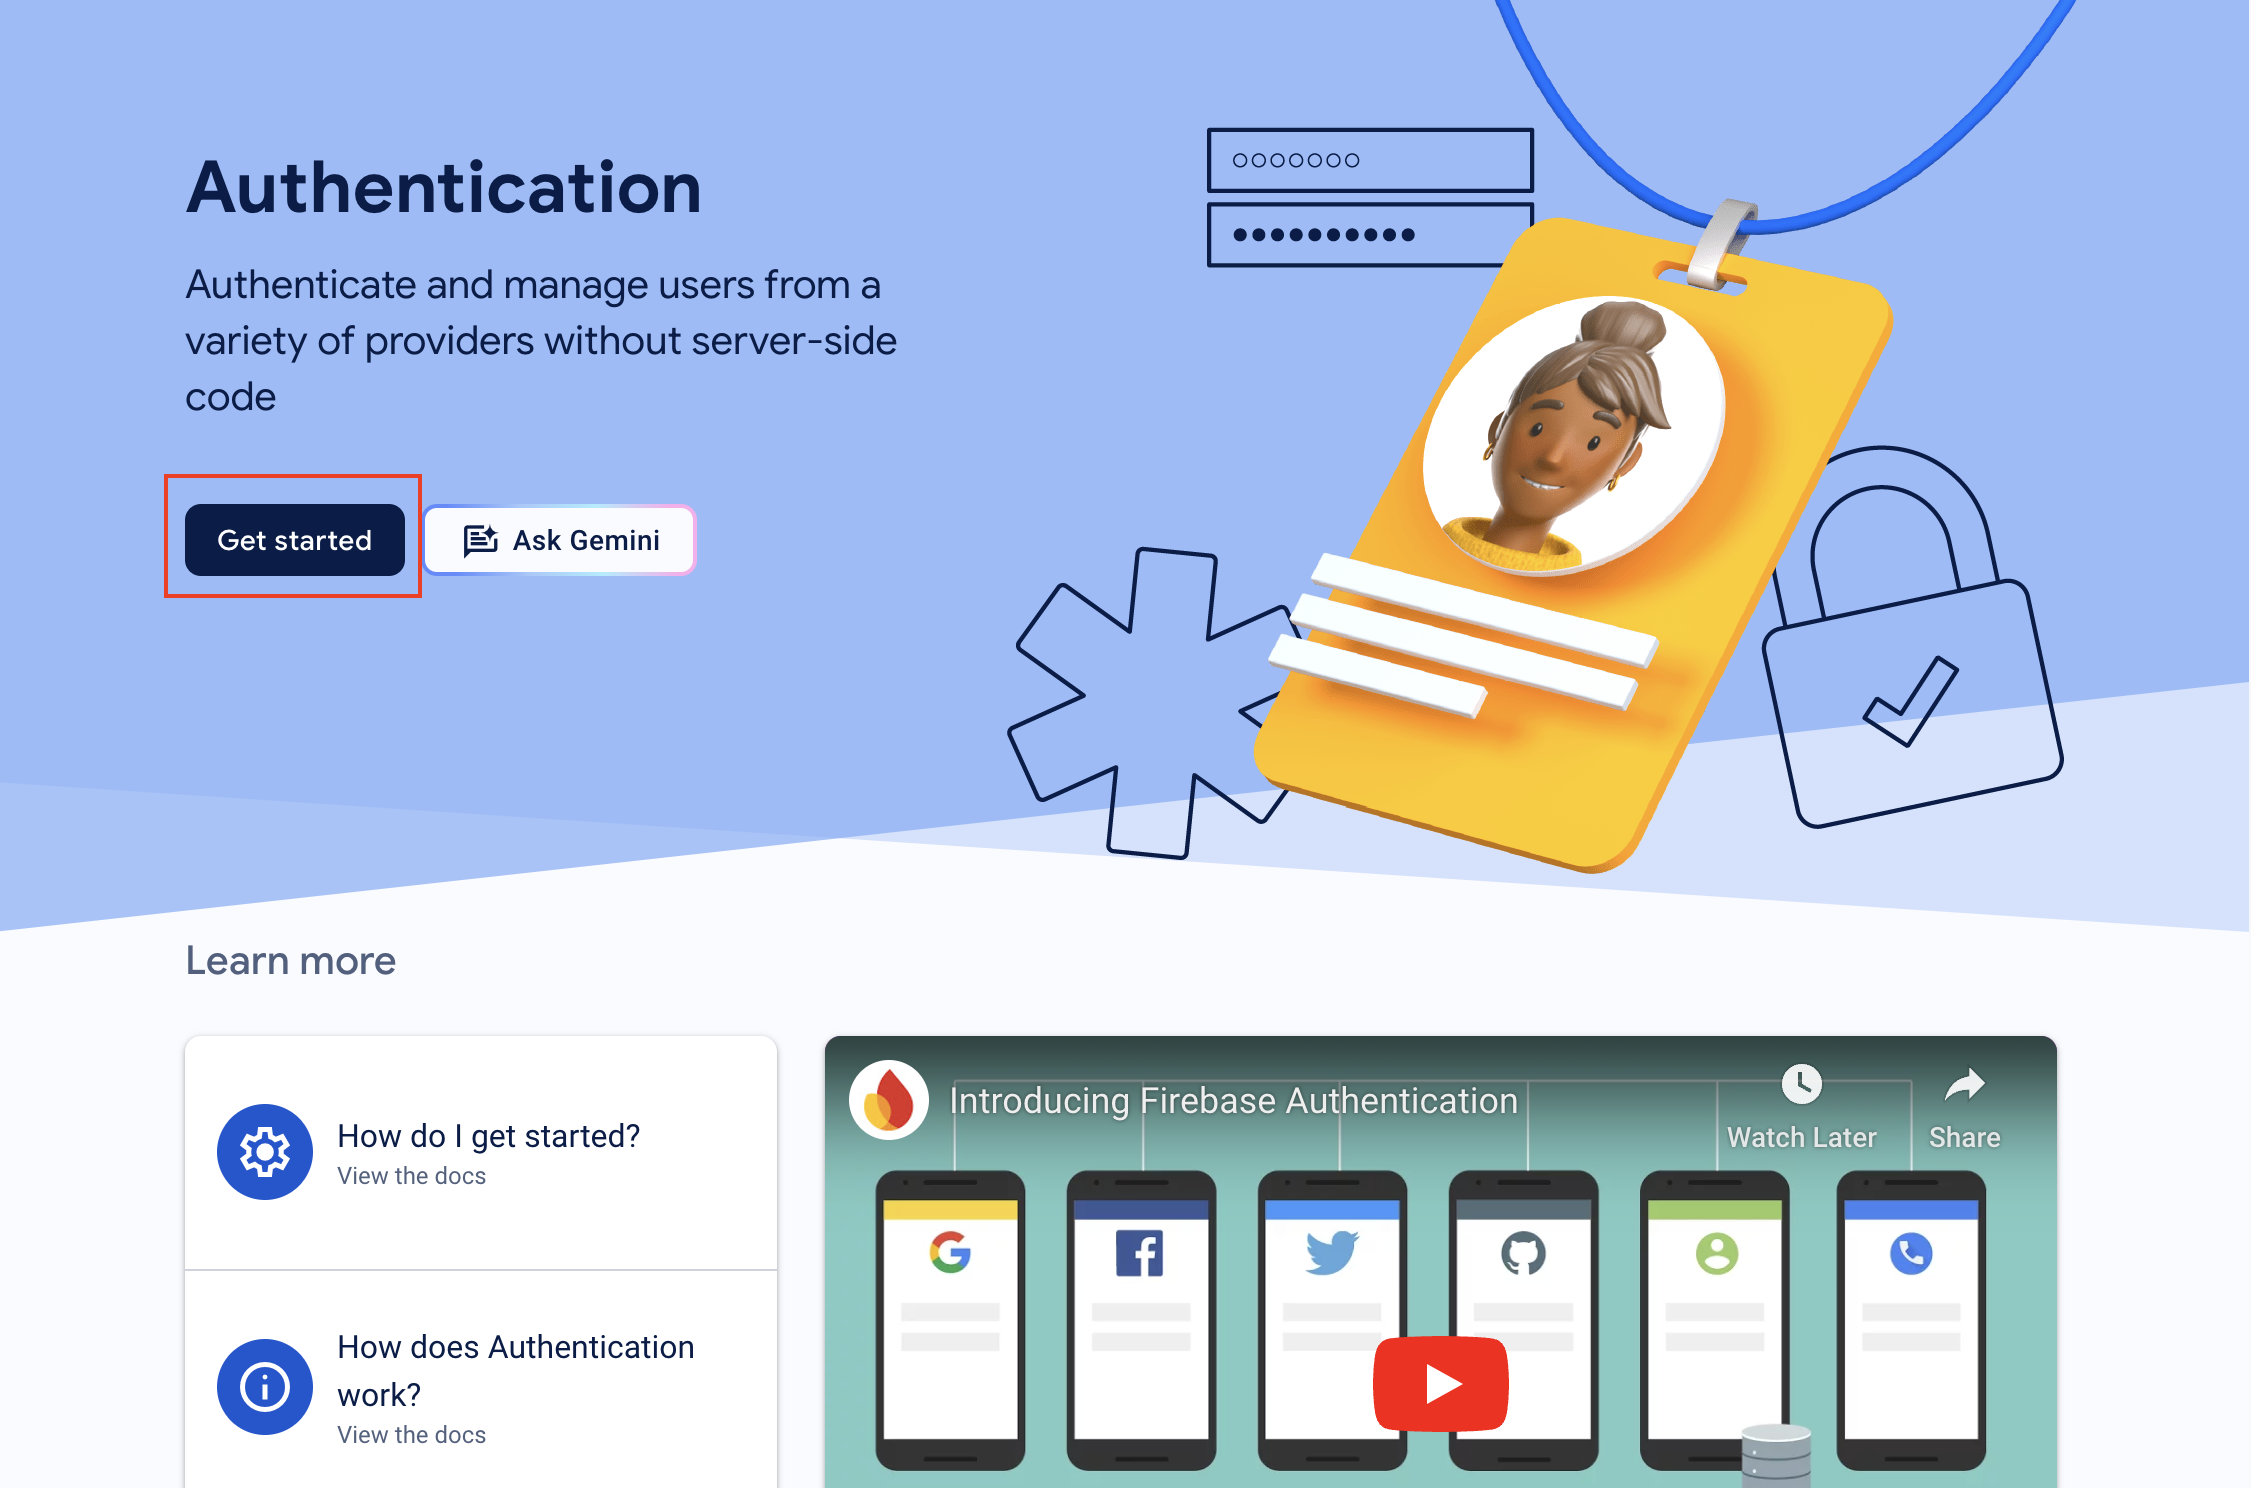
6.7/After clicking on Authentication the new window for authentication will open. Click on Get Started
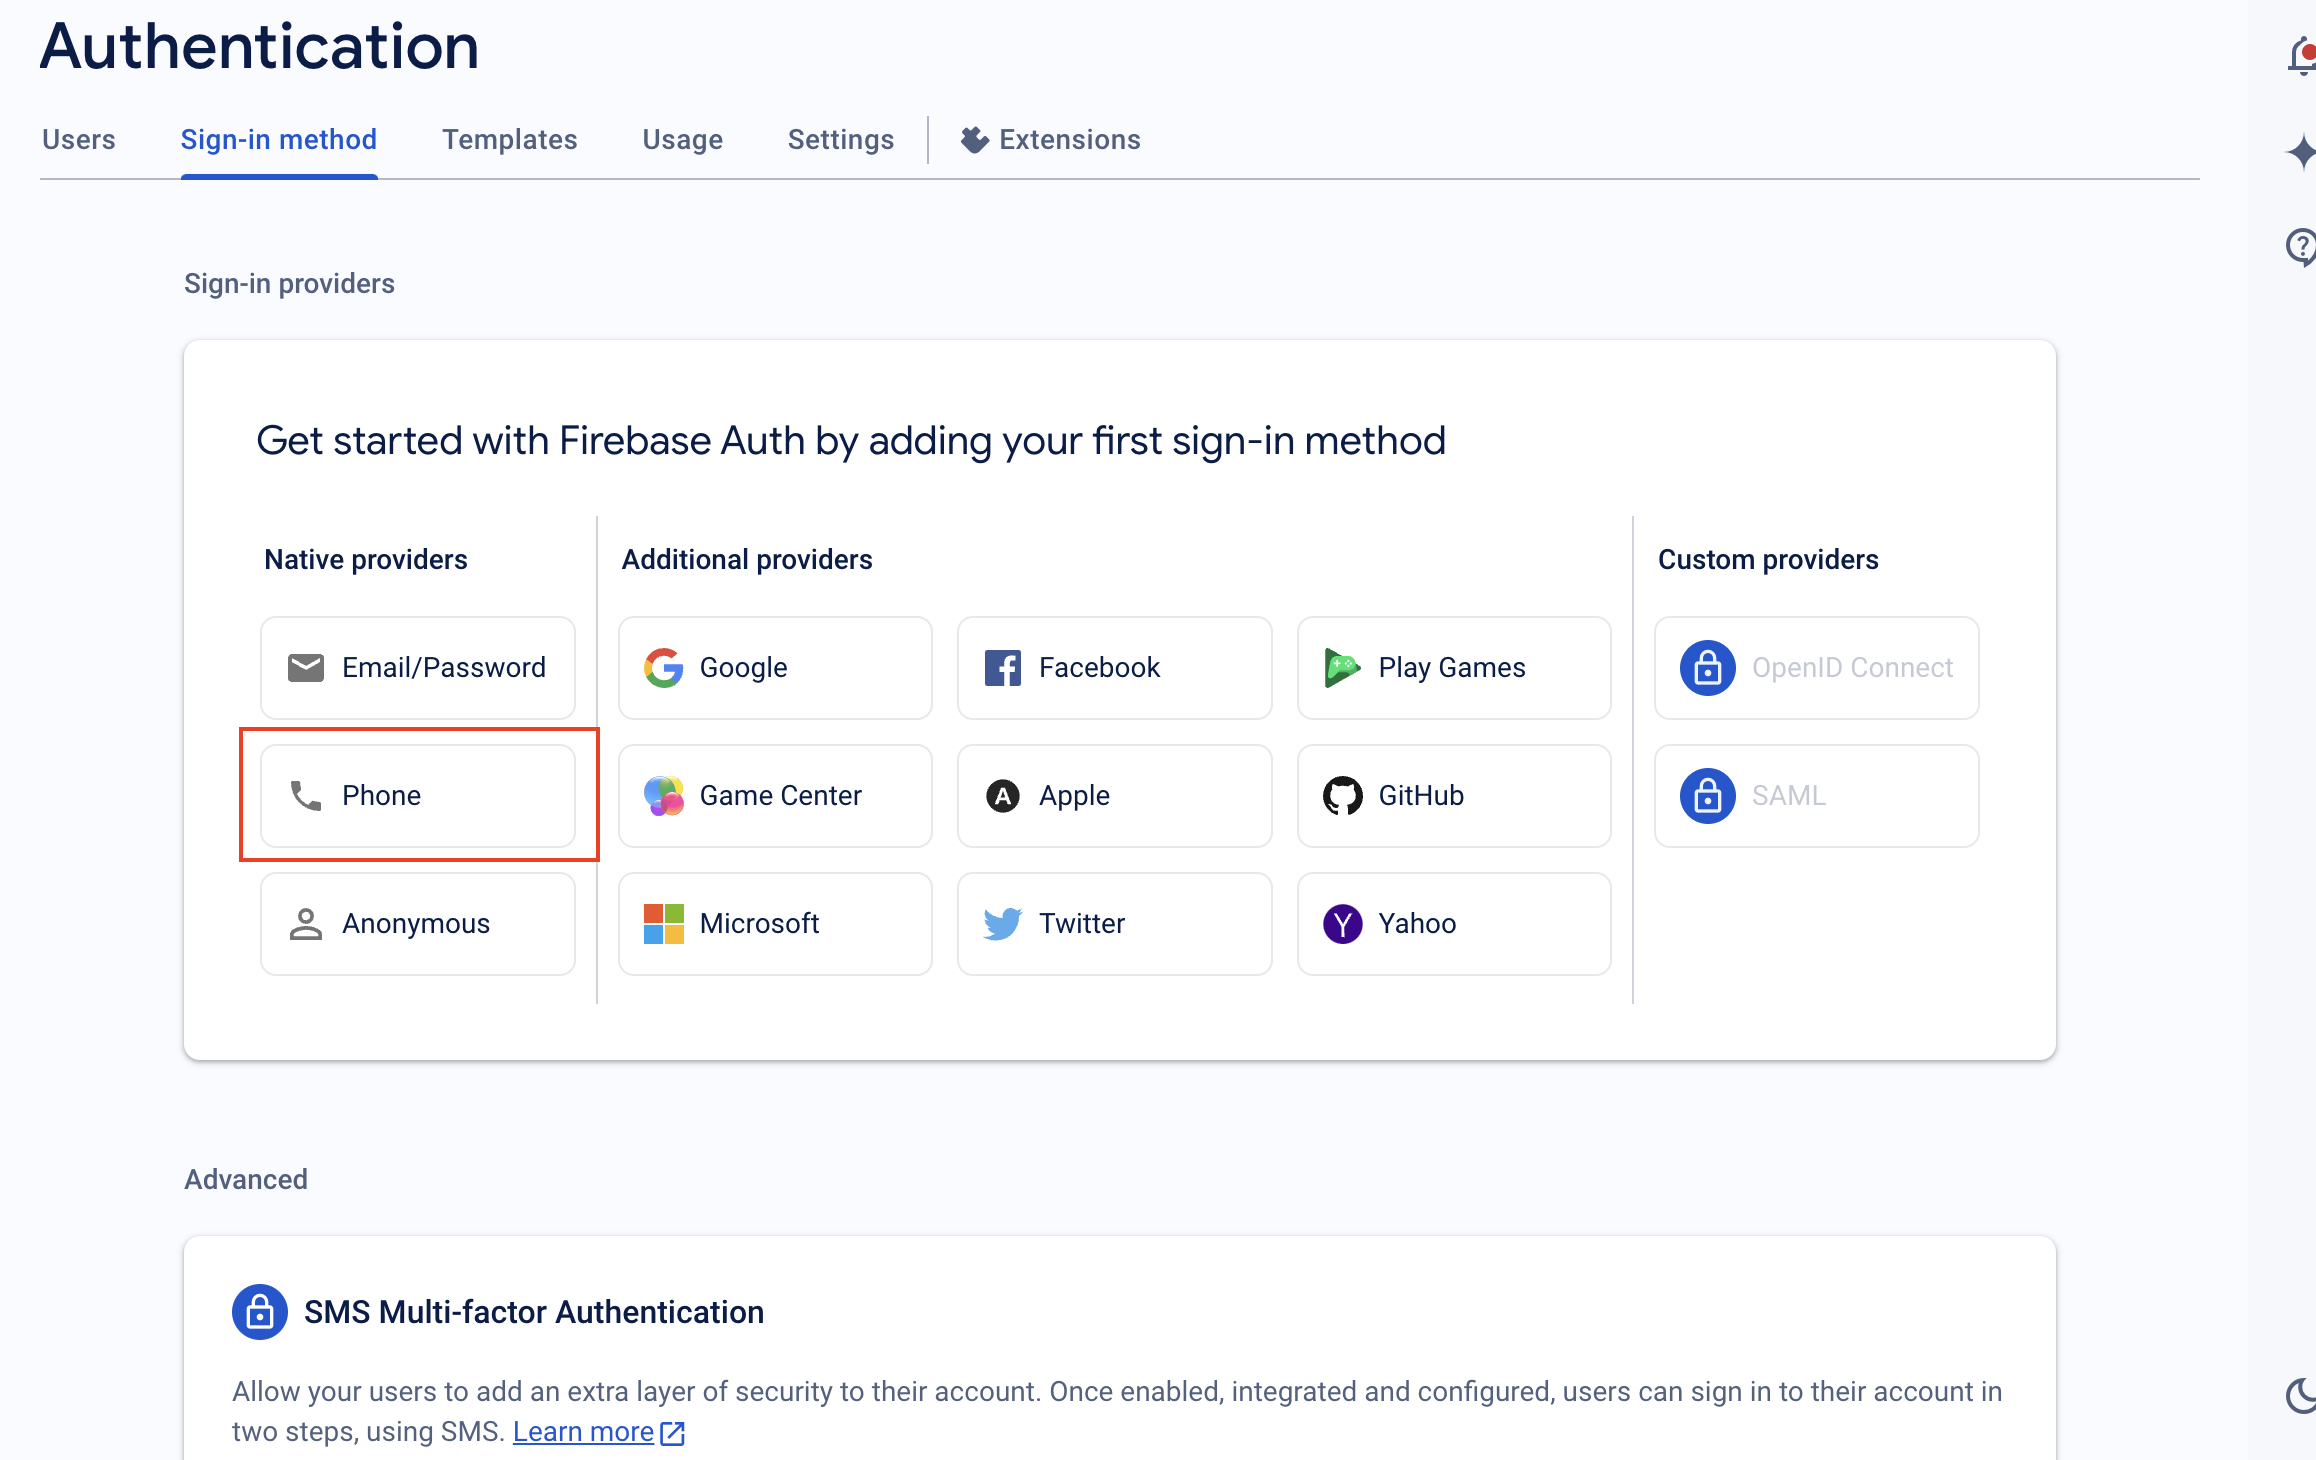
6.8/ Select Email/Password Provider from the new window. if not visible then click on the sign-in option and then click on Add Provider.
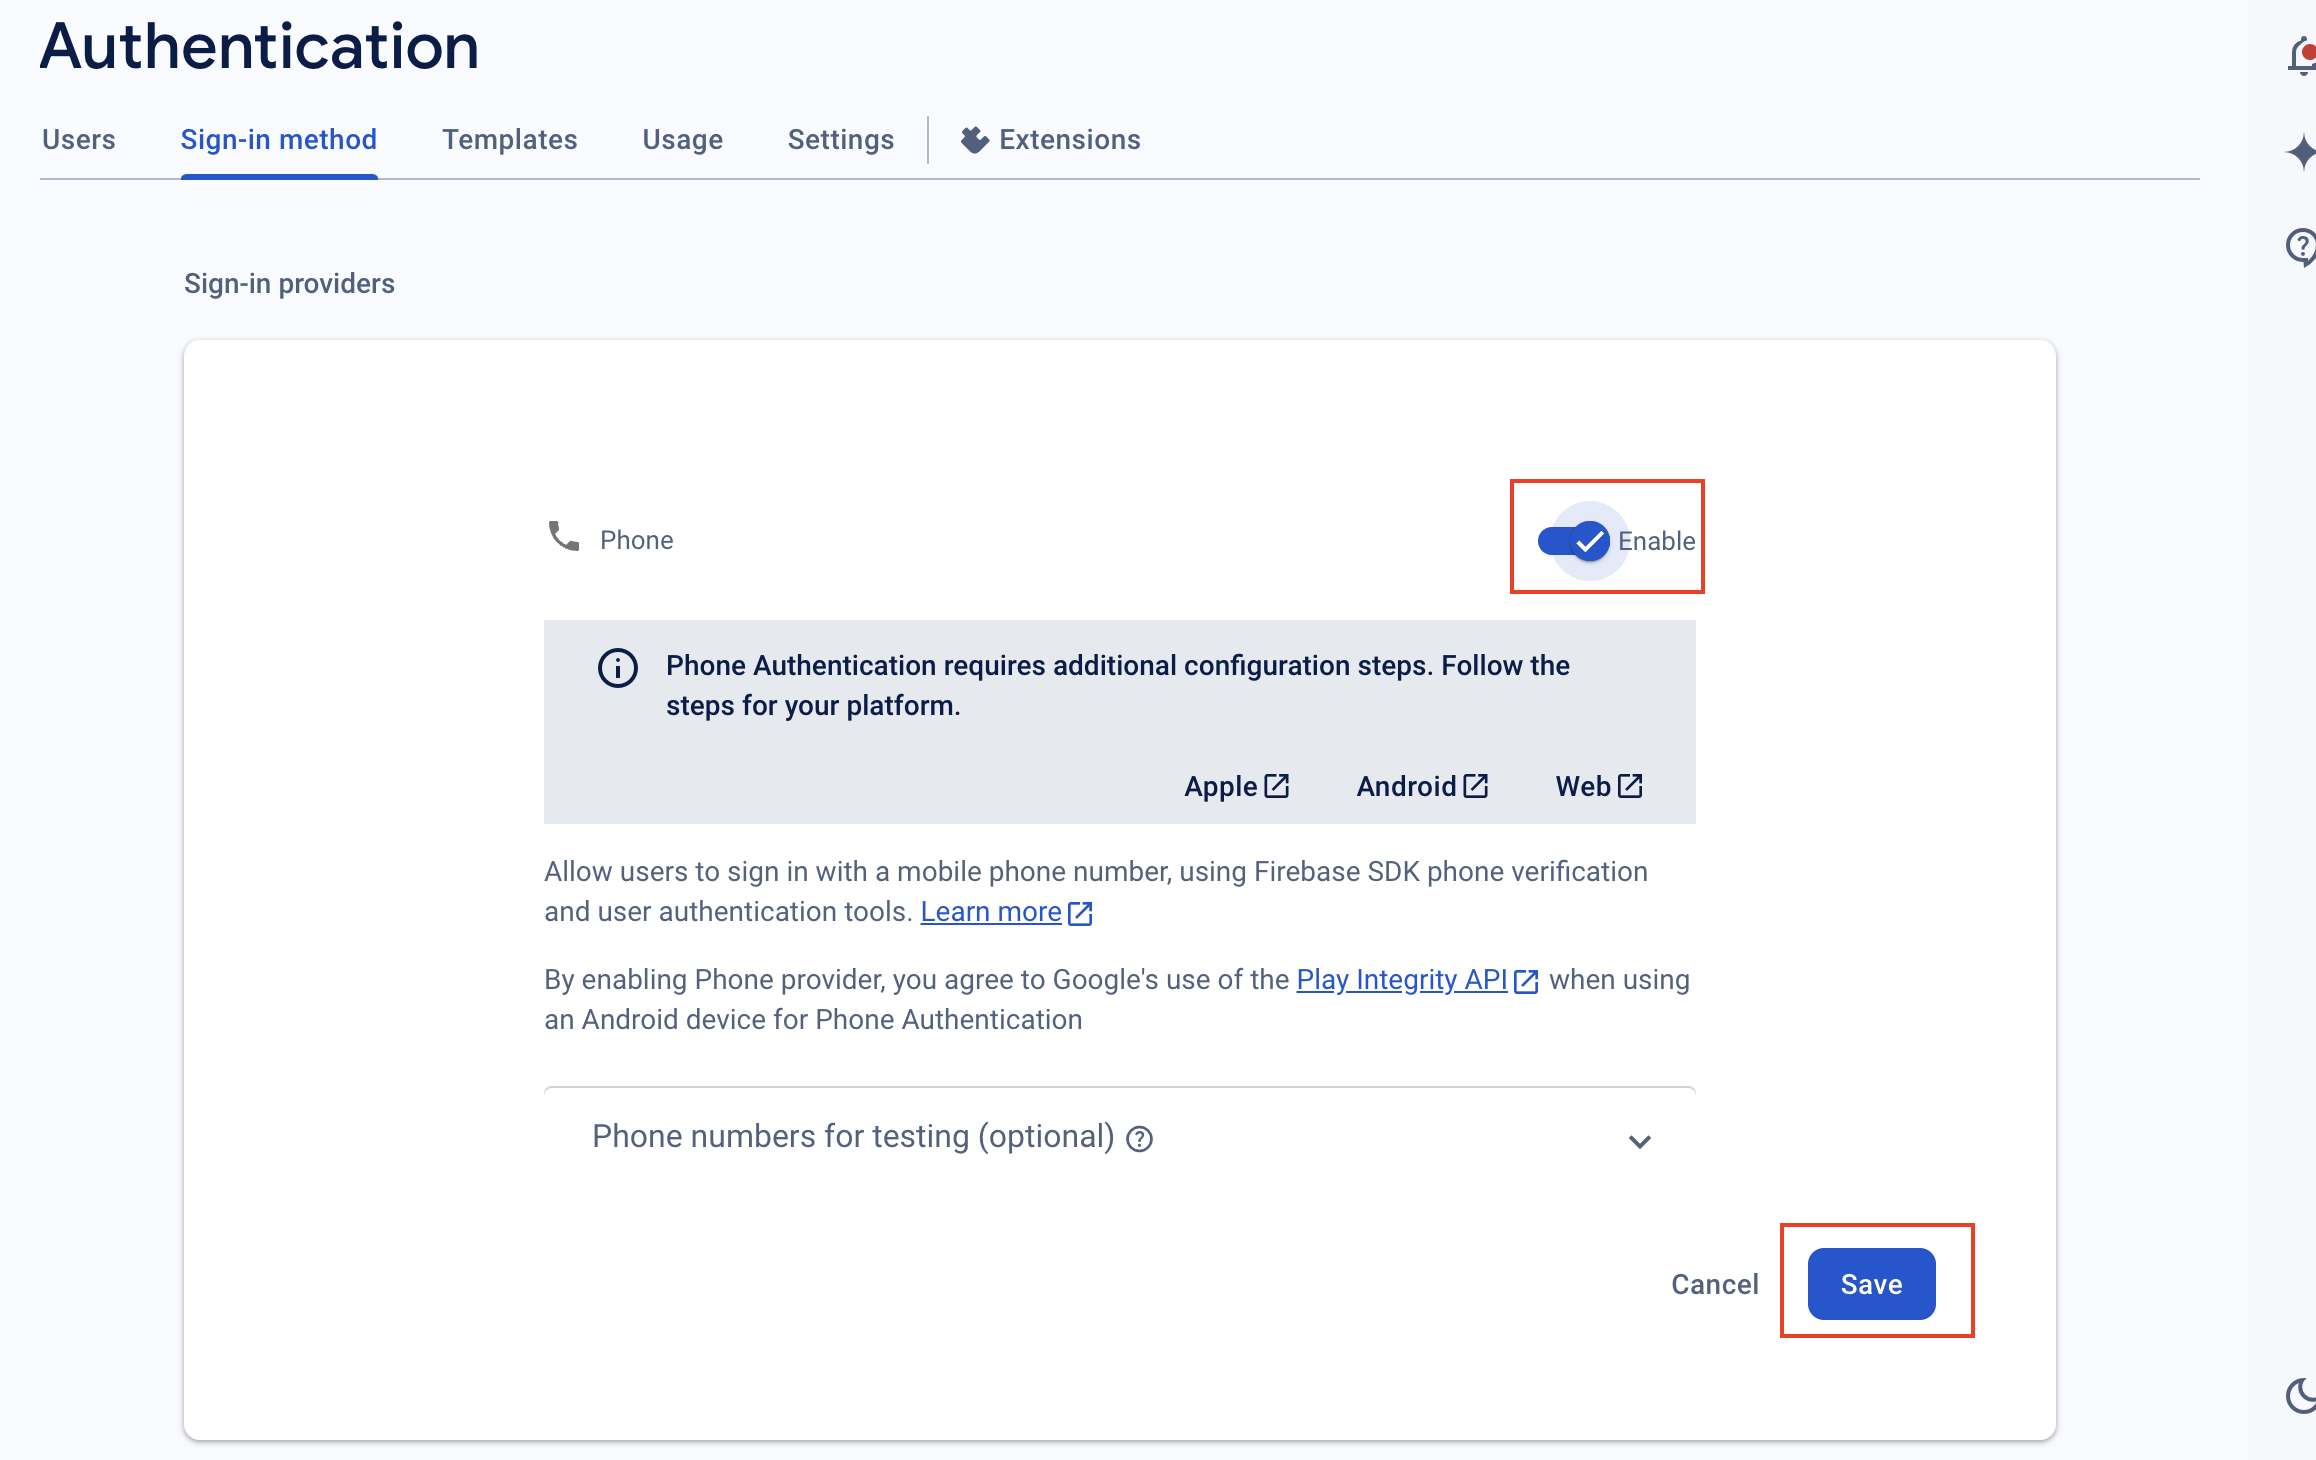
6.9/ Enable Email/Password Provider and Save it.
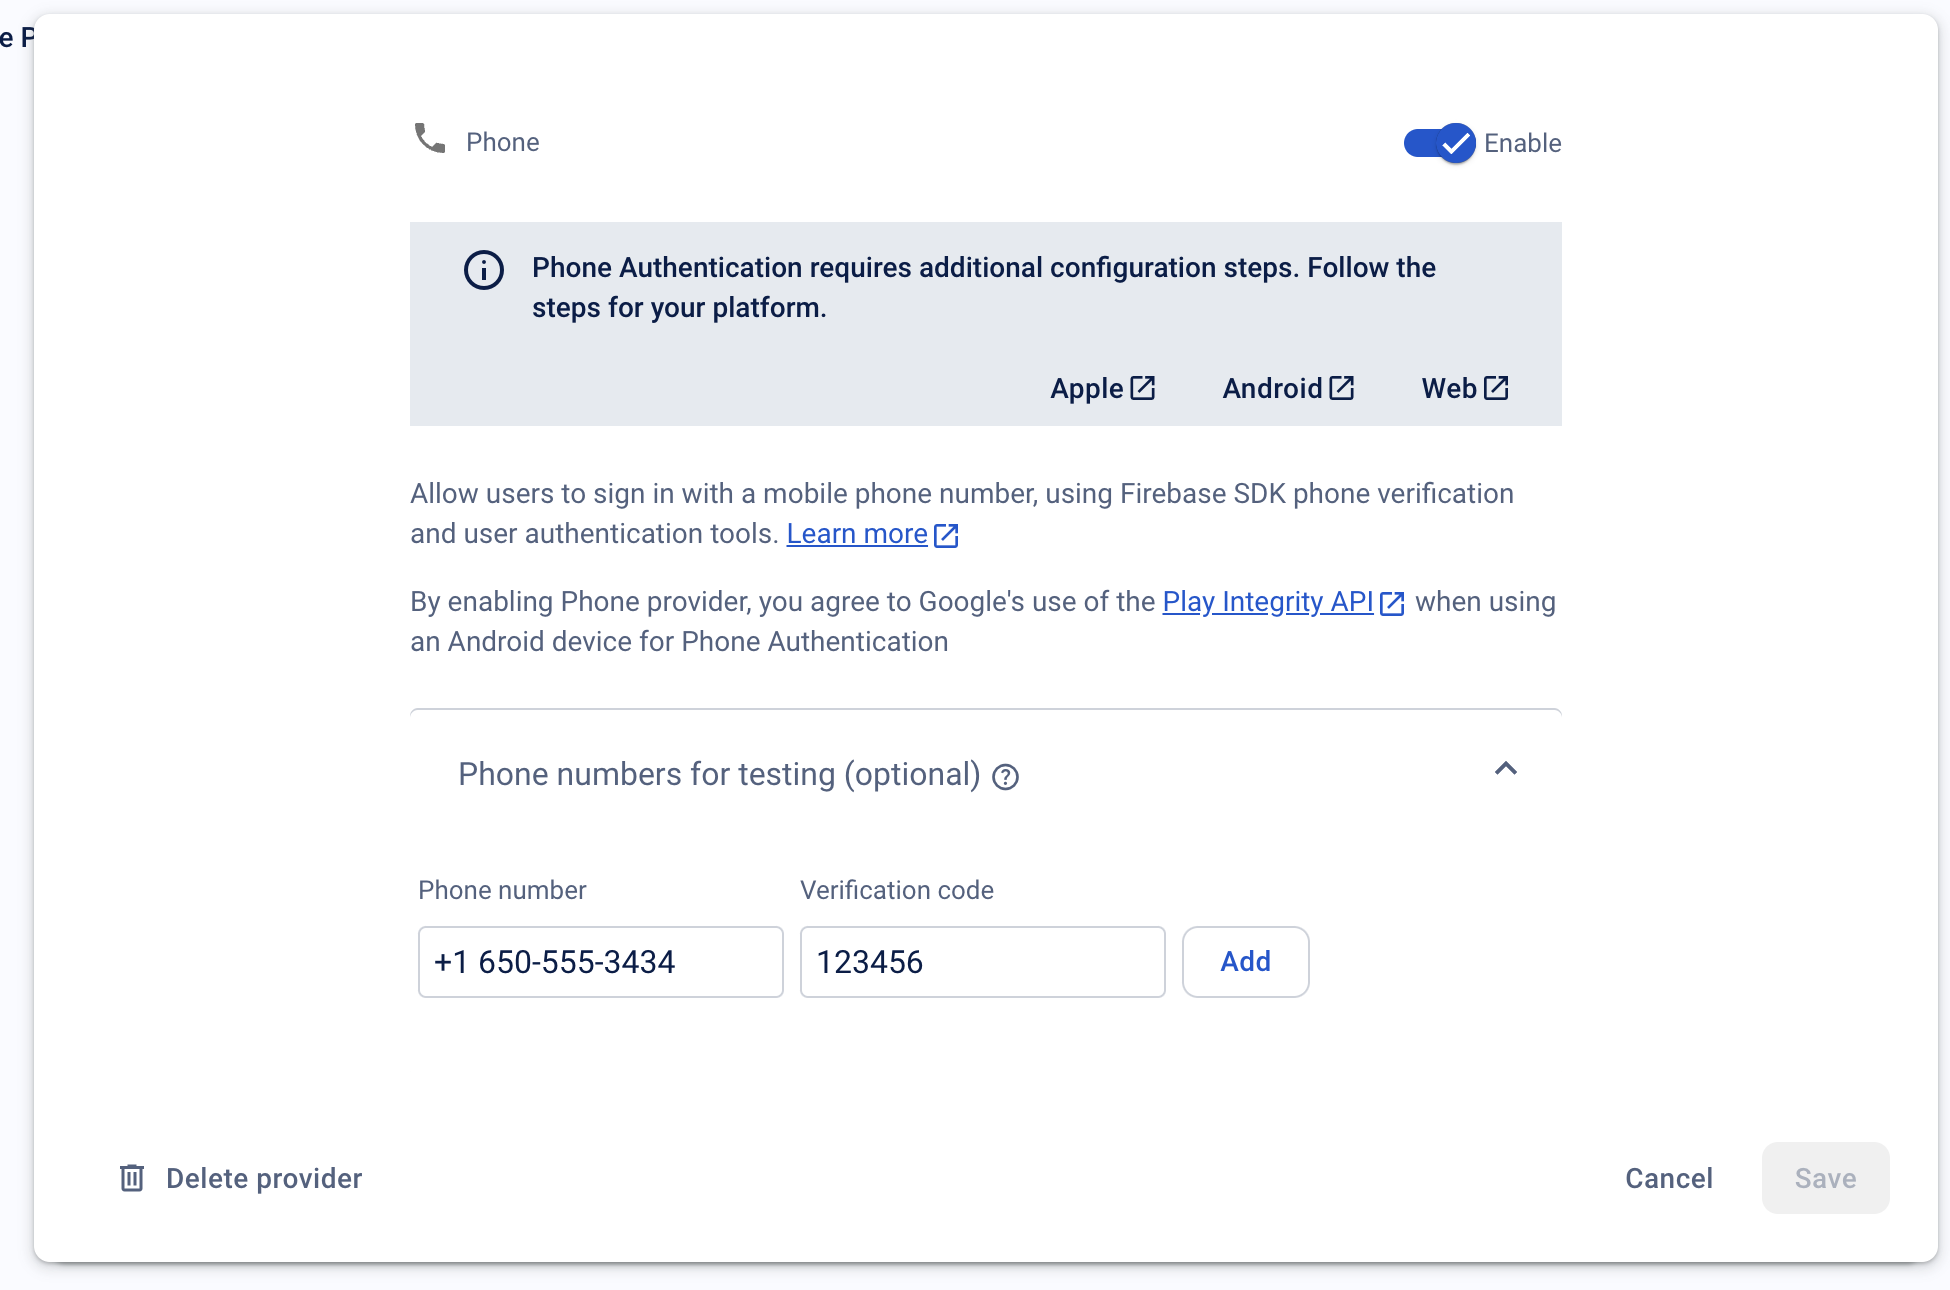
again click on the phone and reopen it.
now add a test phone number and test code for testing.
Now you need to add SHA-1 and SHA-256 to your Firebase project.
Go to the Firebase Project setting. and scroll down to the bottom and you will able to see a option Add Fingerprint
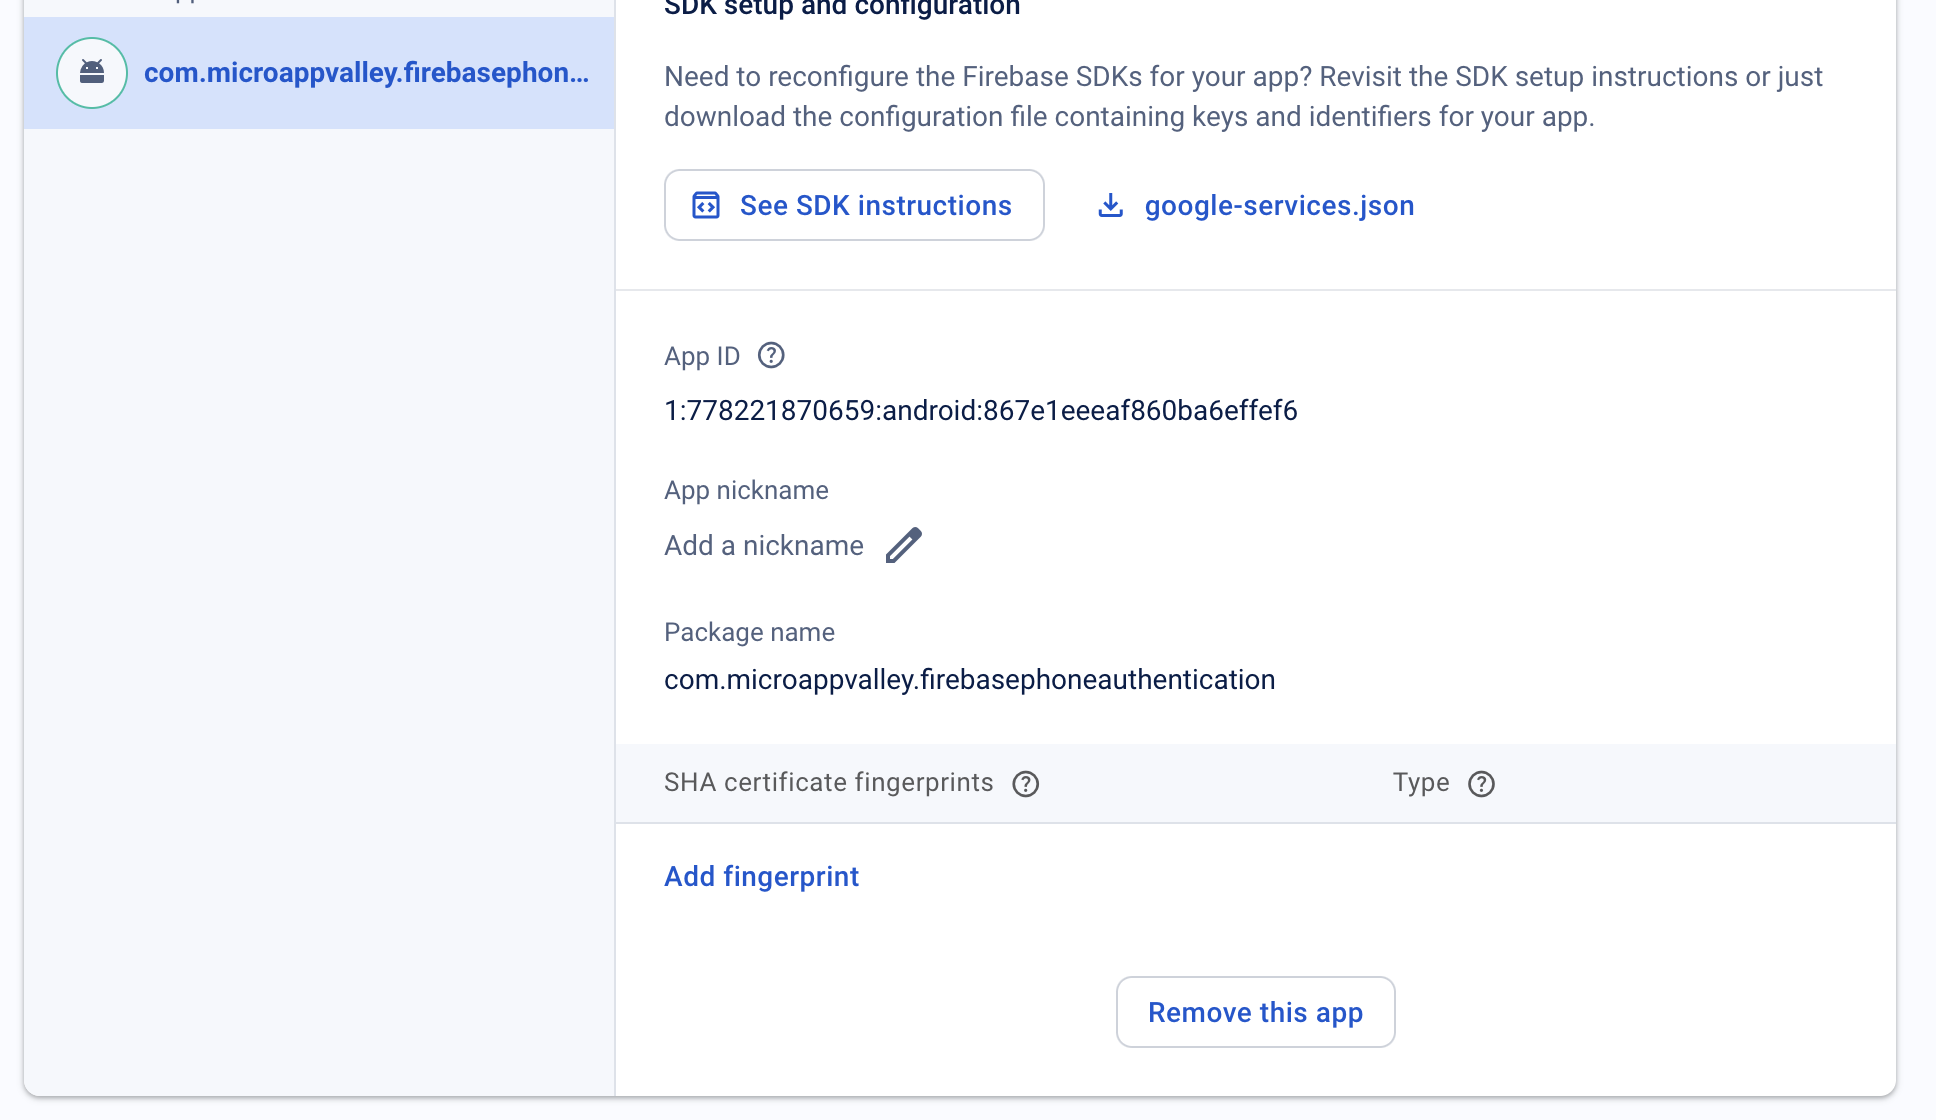
For adding Fingerprint to the project we need to generate the sha keys first for this open your android studio and click on gradle tool the Gradle window will open and then click on gradle terminal below picture is highlighted for this work
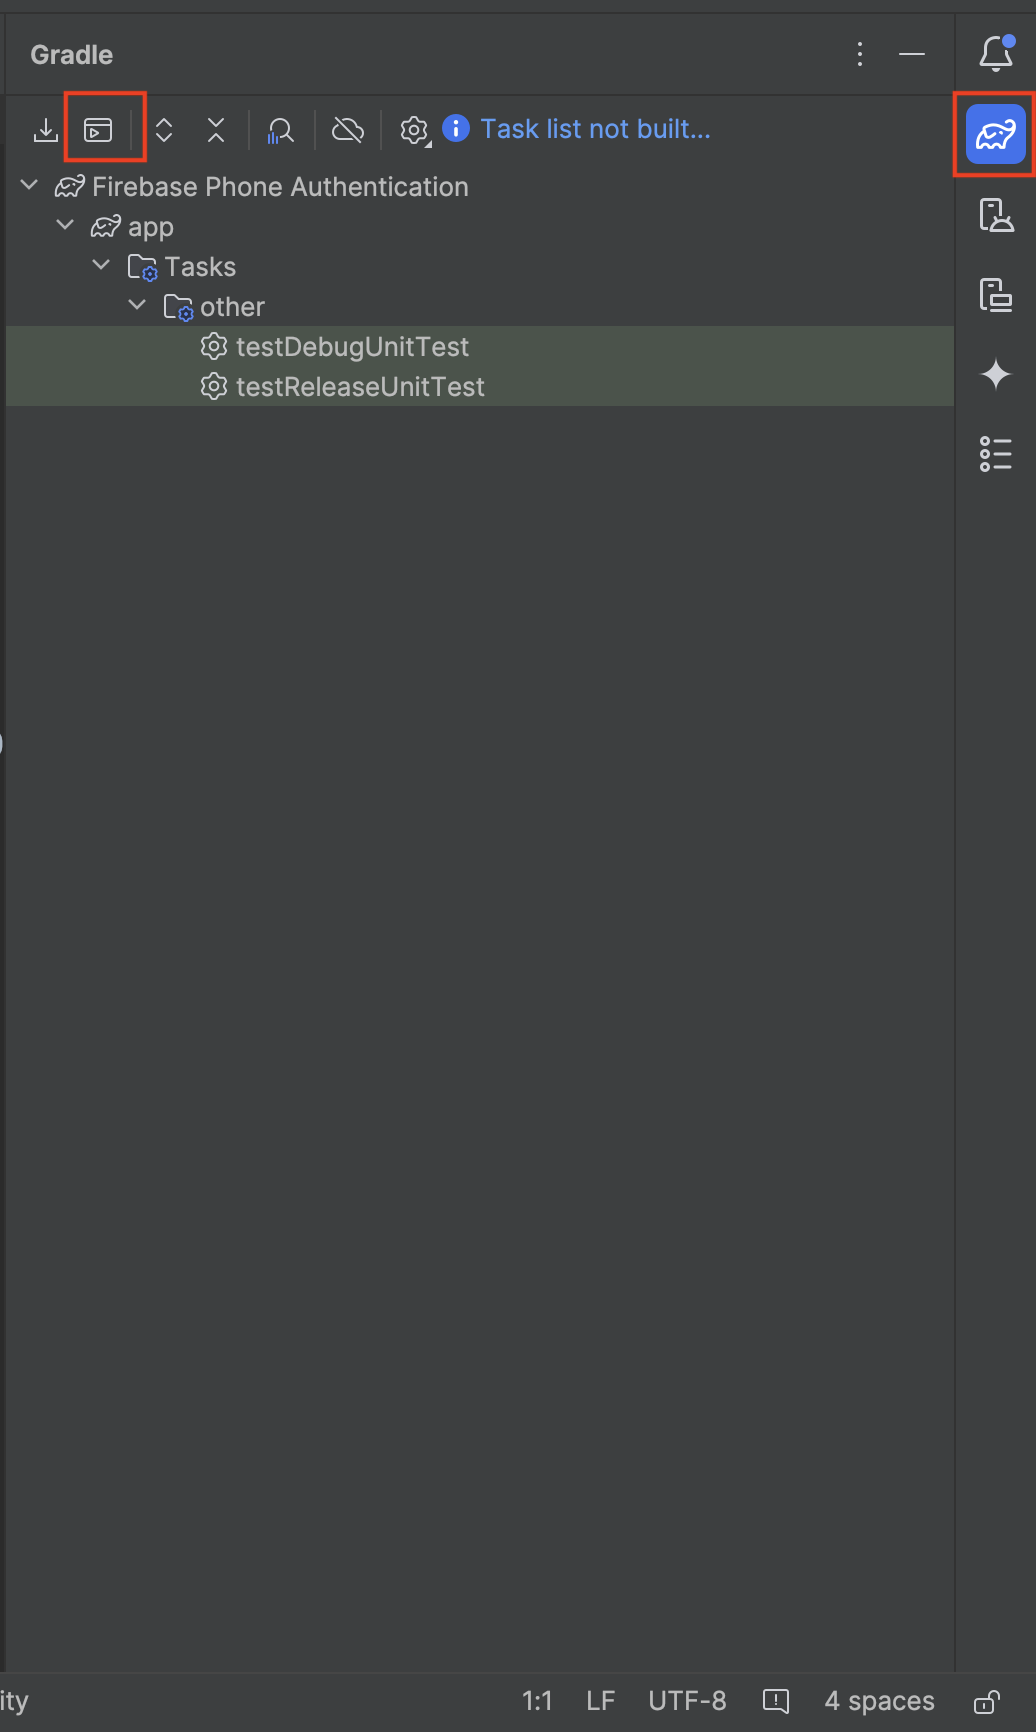
Now the new Gradle terminal window will open write the code shown in the below picture and hit enter. after entering the terminal will open in the below of android studio and sha keys will generated

Scroll on the terminal can see the keys
copy the keys one by one.
first copy the SHA1 key and paste it on the Firebase Add fingerprint section

then click on save. Same process for the SHA-256. Copy, Add Fingerprint, Paste and Save.
Here working with Firebase Project is Complete.
Now Go to your Android Studio You can see Firebase connected on the Firebase tool window where you left the last time on Firebase Tools window
7/ Click on Add the Firebase Authentication SDK to your App. The new popup window will open
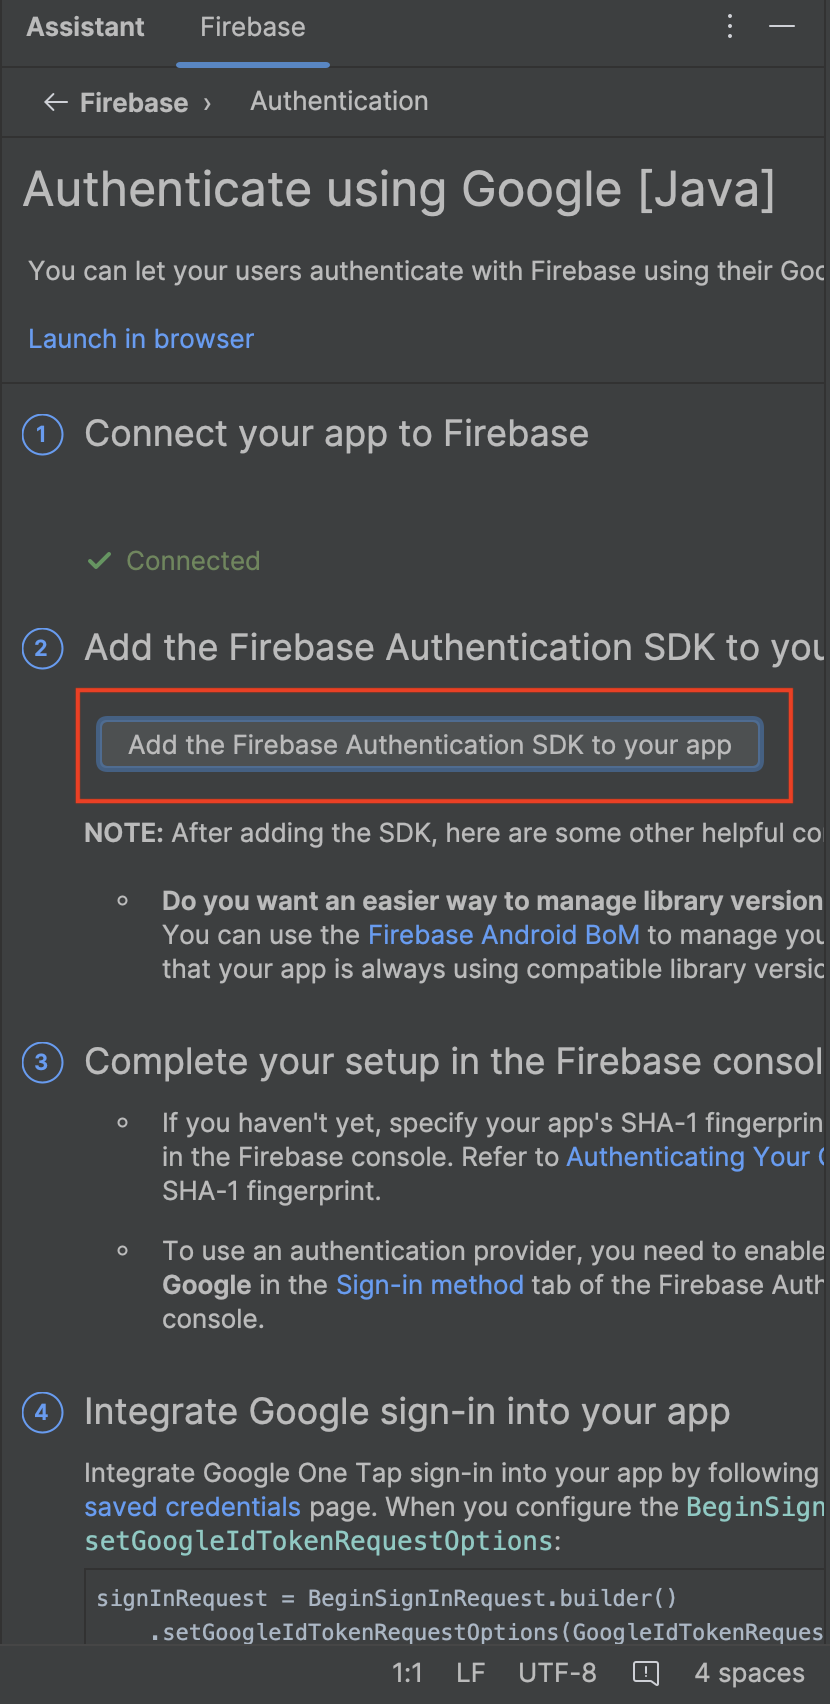
8/ Click on Accept Change. SDK will automatically add to your project.
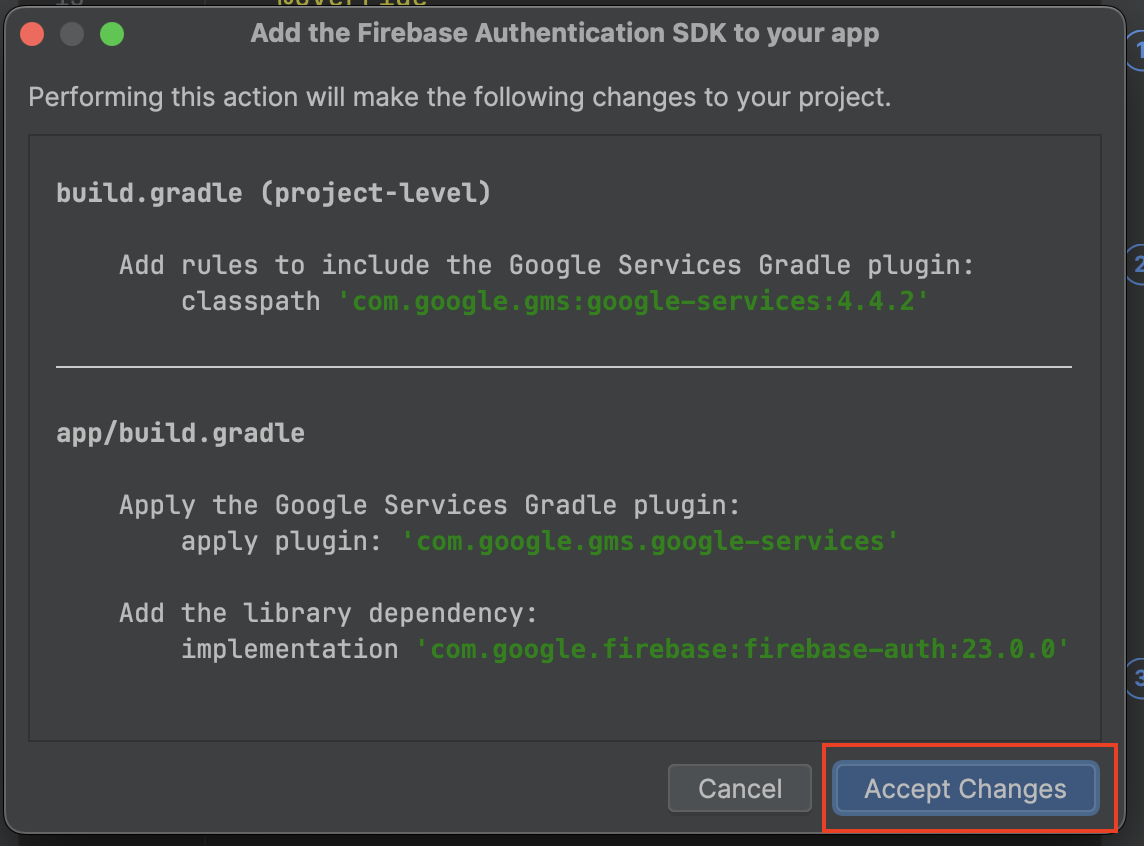
Firebase Connection and SDK setup are complete. Now we will work with activities.
9/ Modify your activity_login.xml:
<?xml version="1.0" encoding="utf-8"?>
<androidx.constraintlayout.widget.ConstraintLayout xmlns:android="http://schemas.android.com/apk/res/android"
    xmlns:app="http://schemas.android.com/apk/res-auto"
    xmlns:tools="http://schemas.android.com/tools"
    android:id="@+id/main"
    android:layout_width="match_parent"
    android:layout_height="match_parent"
    android:layout_margin="16dp"
    tools:context=".LoginActivity">

    <androidx.constraintlayout.widget.ConstraintLayout
        android:layout_width="match_parent"
        android:layout_height="wrap_content"
        app:layout_constraintEnd_toEndOf="parent"
        app:layout_constraintStart_toStartOf="parent"
        app:layout_constraintTop_toTopOf="parent"
        app:layout_constraintBottom_toBottomOf="parent"
        >
        <LinearLayout
            android:id="@+id/linearlayout"
            android:layout_width="match_parent"
            android:layout_height="wrap_content"
            android:orientation="vertical"
            app:layout_constraintEnd_toEndOf="parent"
            app:layout_constraintStart_toStartOf="parent"
            app:layout_constraintTop_toTopOf="parent">

            <EditText
                android:id="@+id/email"
                android:layout_width="match_parent"
                android:layout_height="wrap_content"
                android:hint="Enter Your Email here" />

            <EditText
                android:id="@+id/password"
                android:layout_width="match_parent"
                android:layout_height="wrap_content"
                android:layout_marginTop="16dp"
                android:hint="Enter Your password here" />
        </LinearLayout>

        <Button
            app:layout_constraintTop_toBottomOf="@+id/linearlayout"
            android:layout_marginTop="16dp"
            android:id="@+id/loginButton"
            android:layout_width="match_parent"
            android:layout_height="wrap_content"
            android:text="Login"
            />
        <TextView
            android:id="@+id/or"
            android:layout_width="wrap_content"
            android:layout_height="wrap_content"
            app:layout_constraintTop_toBottomOf="@+id/loginButton"
            app:layout_constraintStart_toStartOf="@id/loginButton"
            app:layout_constraintEnd_toEndOf="@id/loginButton"
            android:layout_marginTop="16dp"
            android:text="OR"
            android:textSize="22sp"
            />
        <TextView
            android:id="@+id/registerButton"
            android:layout_width="wrap_content"
            android:layout_height="wrap_content"
            app:layout_constraintTop_toBottomOf="@+id/or"
            app:layout_constraintStart_toStartOf="@id/or"
            app:layout_constraintEnd_toEndOf="@id/or"
            android:layout_marginTop="16dp"
            android:text="Create an account"
            android:textSize="22sp"
            android:textColor="#21608B"
            />
    </androidx.constraintlayout.widget.ConstraintLayout>

</androidx.constraintlayout.widget.ConstraintLayout>
9/ Modify your activity_main.xml:
<LinearLayout
    xmlns:android="http://schemas.android.com/apk/res/android"
    android:layout_width="match_parent"
    android:layout_height="match_parent"
    android:orientation="vertical"
    android:gravity="center"
    android:padding="16dp">

    <EditText
        android:id="@+id/phoneEditTxt"
        android:layout_width="match_parent"
        android:layout_height="wrap_content"
        android:hint="Enter phone number"
        android:inputType="phone" />

    <Button
        android:id="@+id/sendOtpBtn"
        android:layout_marginTop="8dp"
        android:layout_width="match_parent"
        android:layout_height="wrap_content"
        android:text="Send OTP" />

    <EditText
        android:id="@+id/otpEditTxt"
        android:layout_width="match_parent"
        android:layout_height="wrap_content"
        android:hint="Enter OTP"
        android:inputType="number" />

    <Button
        android:id="@+id/verifyOtpBtn"
        android:layout_marginTop="8dp"
        android:layout_width="match_parent"
        android:layout_height="wrap_content"
        android:text="Verify OTP" />

</LinearLayout>
10/ Modify your MainActivity.java:
package com.microappvalley.firebasephoneauthentication;

import android.content.Intent;
import android.os.Bundle;
import android.util.Log;
import android.view.View;
import android.widget.Button;
import android.widget.EditText;
import android.widget.Toast;

import androidx.annotation.NonNull;
import androidx.appcompat.app.AppCompatActivity;

import com.google.android.gms.tasks.OnCompleteListener;
import com.google.android.gms.tasks.Task;
import com.google.firebase.FirebaseException;
import com.google.firebase.auth.AuthResult;
import com.google.firebase.auth.FirebaseAuth;
import com.google.firebase.auth.PhoneAuthCredential;
import com.google.firebase.auth.PhoneAuthOptions;
import com.google.firebase.auth.PhoneAuthProvider;

import java.util.concurrent.TimeUnit;

public class MainActivity extends AppCompatActivity {

    private EditText phoneEditTxt, otpEditTxt;
    private Button sendOtpBtn, verifyOtpBtn;
    private FirebaseAuth auth;
    private String VERIFICATION_ID;
    @Override
    protected void onCreate(Bundle savedInstanceState) {
        super.onCreate(savedInstanceState);
        setContentView(R.layout.activity_main);

        phoneEditTxt = findViewById(R.id.phoneEditTxt);
        otpEditTxt = findViewById(R.id.otpEditTxt);
        sendOtpBtn = findViewById(R.id.sendOtpBtn);
        verifyOtpBtn = findViewById(R.id.verifyOtpBtn);

        auth = FirebaseAuth.getInstance();

        sendOtpBtn.setOnClickListener(new View.OnClickListener() {
            @Override
            public void onClick(View v) {
                String phoneNumber = phoneEditTxt.getText().toString().trim();

                if (phoneNumber.isEmpty()) {
                    phoneEditTxt.setError("Enter a valid phone number");
                    return;
                }
                sendVerificationCode(phoneNumber);
            }
        });

        verifyOtpBtn.setOnClickListener(new View.OnClickListener() {
            @Override
            public void onClick(View v) {
                String code = otpEditTxt.getText().toString().trim();
                if (code.isEmpty()) {
                    otpEditTxt.setError("Enter OTP");
                    return;
                }
                verifyCode(code);
            }
        });
    }

    private void sendVerificationCode(String phoneNumber) {

        PhoneAuthOptions options =  PhoneAuthOptions.newBuilder(auth)
                        .setPhoneNumber(phoneNumber)
                        .setTimeout(60L, TimeUnit.SECONDS)
                        .setActivity(this)
                        .setCallbacks(new PhoneAuthProvider.OnVerificationStateChangedCallbacks() {
                            @Override
                            public void onVerificationCompleted(@NonNull PhoneAuthCredential phoneAuthCredential) {
                                String code = phoneAuthCredential.getSmsCode();
                                if (code != null) {
                                    otpEditTxt.setText(code);
                                    verifyCode(code);
                                }
                            }
                            @Override
                            public void onVerificationFailed(@NonNull FirebaseException e) {
                                Toast.makeText(MainActivity.this, "Verification Failed", Toast.LENGTH_LONG).show();
                                Log.d("Verification", "Verification Error -> "  + e.getLocalizedMessage());
                            }

                            @Override
                            public void onCodeSent(@NonNull String s, @NonNull PhoneAuthProvider.ForceResendingToken forceResendingToken) {
                                super.onCodeSent(s, forceResendingToken);
                                VERIFICATION_ID = s;
                                Toast.makeText(MainActivity.this, "OTP Sent", Toast.LENGTH_SHORT).show();
                            }
                        }).build();

        PhoneAuthProvider.verifyPhoneNumber(options);
    }

    private void verifyCode(String code) {
        PhoneAuthCredential credential = PhoneAuthProvider.getCredential(VERIFICATION_ID, code);
        signInWithCredential(credential);
    }

    private void signInWithCredential(PhoneAuthCredential credential) {
        auth.signInWithCredential(credential).addOnCompleteListener(new OnCompleteListener<AuthResult>() {
            @Override
            public void onComplete(@NonNull Task task) {
                if (task.isSuccessful()) {
                    Toast.makeText(MainActivity.this, "Login Successful", Toast.LENGTH_LONG).show();
                    startActivity(new Intent(MainActivity.this, SuccessActivity.class));
                    finish();
                } else {
                    Toast.makeText(MainActivity.this, "Login Failed", Toast.LENGTH_LONG).show();
                }
            }
        });
    }
}
11/ Modify your activity_success.xml:
<?xml version="1.0" encoding="utf-8"?>
<RelativeLayout xmlns:android="http://schemas.android.com/apk/res/android"
    xmlns:app="http://schemas.android.com/apk/res-auto"
    xmlns:tools="http://schemas.android.com/tools"
    android:id="@+id/main"
    android:layout_width="match_parent"
    android:layout_height="match_parent"
    tools:context=".SuccessActivity">

    <TextView
        android:layout_width="wrap_content"
        android:layout_height="wrap_content"
        android:text="Verification Successful"
        android:textSize="22sp"
        android:textStyle="bold"
        android:textColor="@android:color/holo_green_light"
        android:layout_centerInParent="true"
        />
</RelativeLayout>
Now run your app and test with the test phone number and code.


